
AlphaSmart Pro Front Panel Replacement

Nathan Smith and 2 other contributors
Last updated on Jan 9, 2015
Views: 689
View statistics:
- Past 24 Hours:
- 3
- Past 7 Days:
- 13
- Past 30 Days:
- 37
- All Time:
- 689
Comments: 0
No one has left comments on this guide. Will you be first?
Go to guide commentsCompleted: 0 1
No one has marked this guide "completed." Will you be the first?
1 person has marked this guide "completed." It's you — great job!
Favorites: 0 1
No one has favorited (and subscribed to) this guide. Will you be the first?
1 person has favorited (and subscribed to) this guide — and that's you!
Introduction
Go to step 1 ↓The front panel may need to be replaced if it is cracked or damaged.
What you need
Tools
-
Spudger4.9


-
-
-
Remove all eight 1 cm Phillips head screws from the back panel of the AlphaSmart Pro with the Phillips #00 Screwdriver.
-
Carefully separate the front panel from the back panel.
 Ask FixBot
-
-
-
To remove the ribbon cable, use the spudger to lift each side of the connector from the socket.
-
Gently pull up on the connector to completely remove the connector from the socket.
-
You are now able to separate the front panel from the back panel.
-
-
-
-
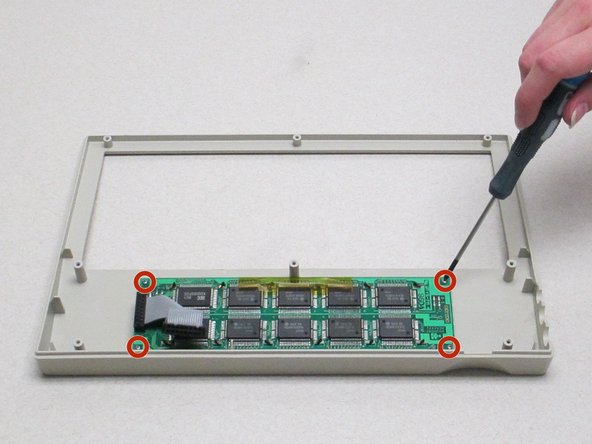
Looking at the front panel, use the Phillips #00 screwdriver to remove the four Phillips head 0.8 cm screws from each corner of the display motherboard.
-
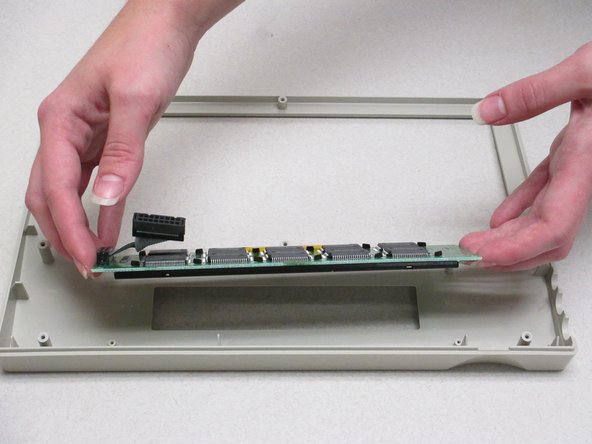
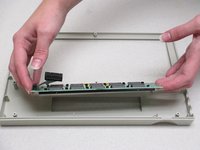
Lift the display screen and motherboard from the plastic front panel to separate the two pieces.
-
-


To reassemble your device, follow these instructions in reverse order.

Team

Clemson, Team 1-1, Benson Fall 2014 Member of Clemson, Team 1-1, Benson Fall 2014
CLEM-BENSON-F14S1G1
4 Members
96 Guides authored
