Free Shipping on Domestic Orders $75+

Alienware X51 Motherboard Replacement

What you need

    1. Alienware X51 Motherboard Replacement, Front Panel: step 1, image 1 of 1
      • Place the PC so the name "Alienware" is on top and facing you.

      • Slide the front panel towards you and lift up.

      Ask FixBot

      Add Comment

    2. Alienware X51 Motherboard Replacement: step 2, image 1 of 1
      • Fully disconnect the panel by unplugging the lighting cord going into the PC's internal system.

      • Remove the front panel from the rest of the device.

      Ask FixBot

      Add Comment

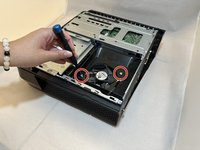
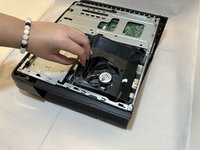
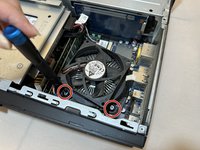
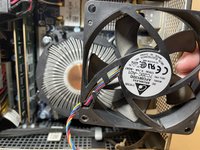
    1. Alienware X51 Motherboard Replacement, Fan: step 3, image 1 of 2 Alienware X51 Motherboard Replacement, Fan: step 3, image 2 of 2
      • Remove the two 2.0 mm screws holding the fan protector in place using a Phillips #1 screwdriver.

      • Remove the protector holding the fan in.

      Ask FixBot

      Add Comment

    2. Alienware X51 Motherboard Replacement: step 4, image 1 of 1
      • Disconnect the Molex KK connector from the fan.

      Ask FixBot

      Add Comment

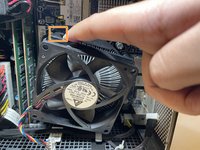
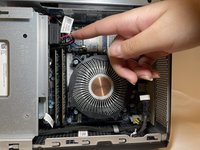
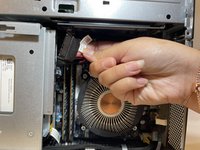
    3. Alienware X51 Motherboard Replacement: step 5, image 1 of 3 Alienware X51 Motherboard Replacement: step 5, image 2 of 3 Alienware X51 Motherboard Replacement: step 5, image 3 of 3
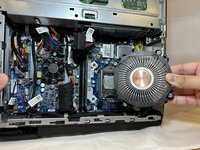
      • Use a Phillips #1 screwdriver to loosen the four spring screws around the fan until you hear a click.

      • Gently pull back the clips and remove the fan by pulling it out.

      Ask FixBot

      Add Comment

    1. Alienware X51 Motherboard Replacement, Disc Drive: step 6, image 1 of 2 Alienware X51 Motherboard Replacement, Disc Drive: step 6, image 2 of 2
      • Disconnect the optical-drive data and power cable.

      Ask FixBot

      Add Comment

    2. Alienware X51 Motherboard Replacement: step 7, image 1 of 1
      • Remove the one 1.0 mm screw using a Phillips #1 screwdriver.

      • Remove the disc drive from the PC.

      Ask FixBot

      Add Comment

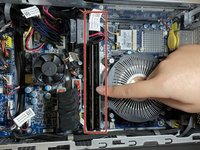
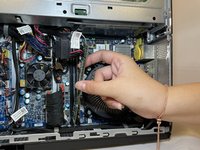
    1. Alienware X51 Motherboard Replacement, RAM: step 8, image 1 of 3 Alienware X51 Motherboard Replacement, RAM: step 8, image 2 of 3 Alienware X51 Motherboard Replacement, RAM: step 8, image 3 of 3
      • Pull apart the clips that hold the RAM sticks in place.

      • Remove the RAM sticks.

      Ask FixBot

      Add Comment

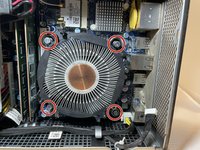
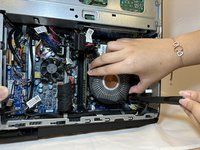
    1. Alienware X51 Motherboard Replacement, Heatsink: step 9, image 1 of 3 Alienware X51 Motherboard Replacement, Heatsink: step 9, image 2 of 3 Alienware X51 Motherboard Replacement, Heatsink: step 9, image 3 of 3
      • Loosen the four 10.0 mm screws around the heatsink with a Phillips #1 screwdriver until you hear a click.

      • These are captive screws and cannot be fully removed.

      • Remove the heatsink by gently prying and lifting it up.

      Ask FixBot

      Add Comment

    1. Alienware X51 Motherboard Replacement, Motherboard: step 10, image 1 of 2 Alienware X51 Motherboard Replacement, Motherboard: step 10, image 2 of 2
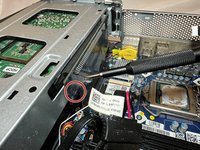
      • Remove the single 1.0 mm screw with a Phillips #1 screwdriver.

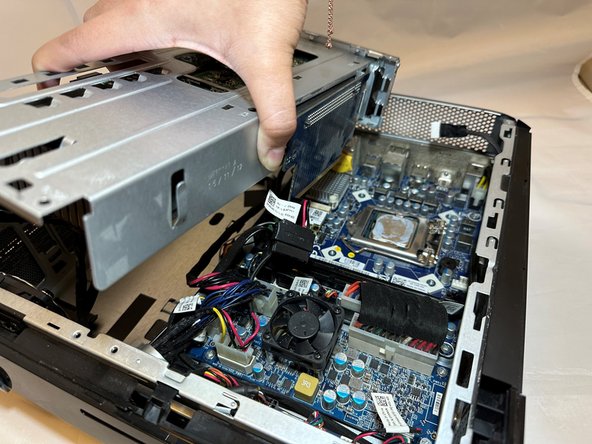
      • Firmly remove the internal PC system by lifting it out of the PC.

      Ask FixBot

      Add Comment

    2. Alienware X51 Motherboard Replacement: step 11, image 1 of 2 Alienware X51 Motherboard Replacement: step 11, image 2 of 2
      • Loosen the four 1.0 mm screws holding down the motherboard using a Phillips #1 screwdriver.

      Ask FixBot

      Add Comment

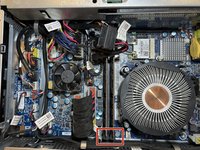
    3. Alienware X51 Motherboard Replacement: step 12, image 1 of 2 Alienware X51 Motherboard Replacement: step 12, image 2 of 2
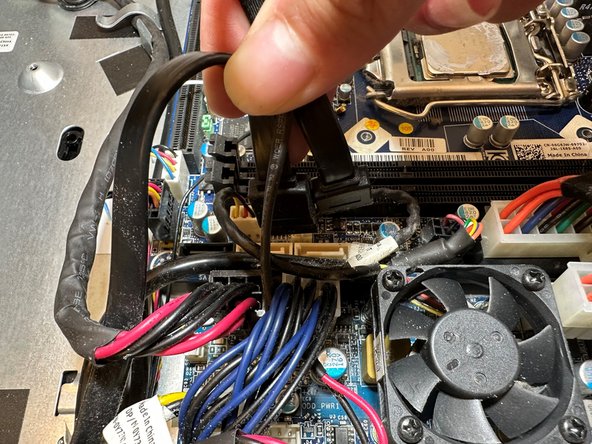
      • Disconnect the two SATA plugs going into the motherboard processor.

      Ask FixBot

      Add Comment

    4. Alienware X51 Motherboard Replacement: step 13, image 1 of 1
      • Disconnect the rectangular power supply plug from the motherboard into the other circuit board.

      Ask FixBot

      Add Comment

    5. Alienware X51 Motherboard Replacement: step 14, image 1 of 1
      • Disconnect the bundled cable connector going into the motherboard.

      Ask FixBot

      Add Comment

    6. Alienware X51 Motherboard Replacement: step 15, image 1 of 1
      • Disconnect the white bundled cable connector from the motherboard.

      Ask FixBot

      Add Comment

    7. Alienware X51 Motherboard Replacement: step 16, image 1 of 1
      • Disconnect the rectangular yellow bundled cable connector plug going into the motherboard.

      Ask FixBot

      Add Comment

    8. Alienware X51 Motherboard Replacement: step 17, image 1 of 1
      • Disconnect the power supply.

      Ask FixBot

      Add Comment

    9. Alienware X51 Motherboard Replacement: step 18, image 1 of 1
      • Disconnect the rectangular white bundled cable connector going into the motherboard.

      Ask FixBot

      Add Comment

    10. Alienware X51 Motherboard Replacement: step 19, image 1 of 2 Alienware X51 Motherboard Replacement: step 19, image 2 of 2
      • Gently slide and lift out the motherboard from the PC.

      Ask FixBot

      Add Comment

Conclusion

To reassemble your device, follow these instructions in reverse order.

Cancel: I did not complete this guide.

One other person completed this guide.

0 Guide Comments

Add Comment

View Statistics:

Past 24 Hours: 4

Past 7 Days: 12

Past 30 Days: 51

All Time: 1,176