
Alienware P18G M14X R1 Hard Drive Replacement

Andonaq Grozdani and 2 other contributors
Last updated on Nov 16, 2022
Views: 4K
View statistics:
- Past 24 Hours:
- 4
- Past 7 Days:
- 25
- Past 30 Days:
- 90
- All Time:
- 3,995
Comments: 2
2 comments on steps.
Completed: 6 7
6 people have marked this guide "completed." Will you be next?
7 people have marked this guide "completed." Including you — great job!
Favorites: 0 1
No one has favorited (and subscribed to) this guide. Will you be the first?
1 person has favorited (and subscribed to) this guide — and that's you!
Featured Student Guide
This guide has been the hard work of our awesome students and is found to be exceptionally cool by the iFixit staff.
Introduction
Go to step 1 ↓This guide will show you how to replace the hard drive for the Alienware P18G M14X R1. To replace the hard drive you will need to remove the battery and the Optical drive.
What you need
Fix Kit
This kit contains all the parts and tools needed to complete this guide.

Parts


Tools


-
-
-
Loosen the top left and top right 6.5mm PH1 screws that hold down the back cover.
 Ask FixBot
-
-
-
-
-
Using PH1 screwdriver loosen the two screws on the right of the battery.
-
-
-
Disconnect the clip connecting the battery to the computer.
-
Set battery aside.
-
-
-
-
-
Unscrew the four 6.35mm screws using the PH1, that hold down the optical drive.
-
-
-
Using the plastic opening tool unclip the white connector holding down the orange cable.
-
-
-
-
Using the tab on the optical drive, lift the optical drive out of the computer and set it aside.
-
-
-
-
-
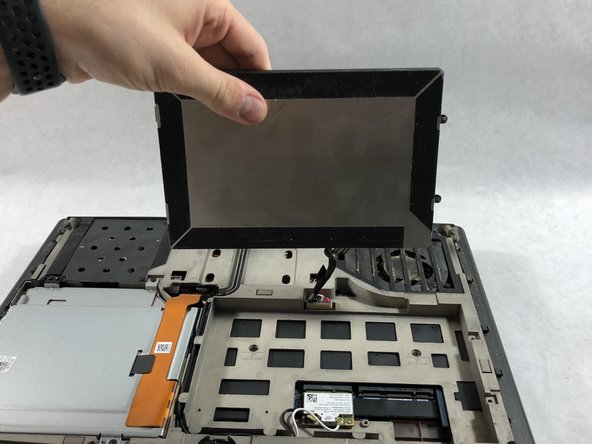
Loosen the three 6.35 mm screws using the PH1 screw driver, to release the hard drive.
-
-




To reassemble your device, follow these instructions in reverse order.
Cancel: I did not complete this guide.
6 other people completed this guide.

Team

UMass Dartmouth, Team S2-G2, Simcock Spring 2018 Member of UMass Dartmouth, Team S2-G2, Simcock Spring 2018
UMASSD-SIMCOCK-S18S2G2
3 Members
60 Guides authored
