Free Shipping on Domestic Orders $75+

Alienware M14xR2 Display Assembly Replacement

What you need

    1. Alienware M14xR2 Display Assembly Replacement, Battery: step 1, image 1 of 1
      • Turn the computer off.

      • Disconnect the charging cable from the computer.

      • Failure to unplug the charging cable could result in electric shock and serious injury.

      • Flip the computer upside down.

      Ask FixBot

      Add Comment

    2. Alienware M14xR2 Display Assembly Replacement: step 2, image 1 of 3 Alienware M14xR2 Display Assembly Replacement: step 2, image 2 of 3 Alienware M14xR2 Display Assembly Replacement: step 2, image 3 of 3
      • Loosen the two 6.35 mm size 1 Phillips screws on the back cover.

      • The two screws are spring loaded and will not separate from the cover.

      • Slide the back cover towards you and then lift upwards to remove.

      Ask FixBot

      Add Comment

    3. Alienware M14xR2 Display Assembly Replacement: step 3, image 1 of 1
      • Loosen the two 6.35 mm size 1 Philips screws attaching the battery to the laptop.

      • The two screws are clipped into the battery and will not detach.

      Ask FixBot

      Add Comment

    4. Alienware M14xR2 Display Assembly Replacement: step 4, image 1 of 3 Alienware M14xR2 Display Assembly Replacement: step 4, image 2 of 3 Alienware M14xR2 Display Assembly Replacement: step 4, image 3 of 3
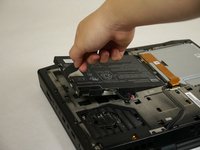
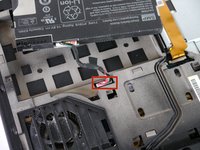
      • Pull up on the black tab on the battery to reveal the connection between the battery and laptop.

      • Pull up on the white connector to disconnect it from the laptop.

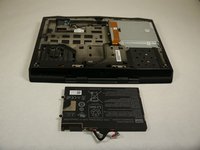
      • The battery is now free to remove from the laptop and can be set aside.

      Ask FixBot

      Add Comment

    1. Alienware M14xR2 Display Assembly Replacement, Removing the Mini-Card Antenna Cables: step 5, image 1 of 1
      • WARNING: Before working inside your computer, read the safety information that shipped with your computer and follow the steps in Before You Begin.

      • Note the routing of the WirelessHD card (optional) and mini-card antenna cables and remove them from the routing guides on the computer base.

      Ask FixBot

      Add Comment

    2. Alienware M14xR2 Display Assembly Replacement, Turn the Computer Over: step 6, image 1 of 1
      • NOTE: The WirelessHD card is optional and may not be present in your computer.

      • Turn the computer over and open the display as far as possible.

      Ask FixBot

      Add Comment

    3. Alienware M14xR2 Display Assembly Replacement, Disconnecting the Display Cable: step 7, image 1 of 1
      • Make sure the Center-Control Cover, the Keyboard and the Palm-Rest Assembly are removed.

      • Using the pull-tab, disconnect the display cable from the connector on the system board.

      Ask FixBot

      Add Comment

    4. Alienware M14xR2 Display Assembly Replacement, Disconnecting the Logo-Board Cable: step 8, image 1 of 1
      • Disconnect the logo-board cable from the connector on the system board.

      Ask FixBot

      Add Comment

    5. Alienware M14xR2 Display Assembly Replacement, Peeling the Display Cable: step 9, image 1 of 1
      • Gently peel the display cable and the logo-board cable from the system board.

      Ask FixBot

      Add Comment

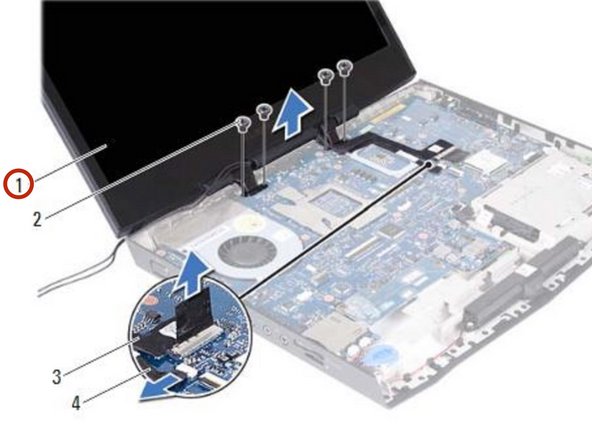
    6. Alienware M14xR2 Display Assembly Replacement, Remove the Screws: step 10, image 1 of 1
      • Remove the screws that secure the display assembly to the computer base.

      Ask FixBot

      Add Comment

    7. Alienware M14xR2 Display Assembly Replacement, Lifting the Display Assembly: step 11, image 1 of 1
      • Gently slide the WirelessHD (optional) and mini-card antenna cables out through the slot on the computer base.

      • Lift the display assembly off the computer.

      Ask FixBot

      Add Comment

    8. Alienware M14xR2 Display Assembly Replacement, Placing the Display Assembly: step 12, image 1 of 1
      • Slide the WirelessHD (optional) and mini-card antenna cables through the slot on the computer base.

      • Place the NEW display assembly in position and replace the screws that secure the display assembly to the computer base.

      • NOTE: Ensure that no cables lie between the display assembly and the computer base.

      Ask FixBot

      Add Comment

    9. Alienware M14xR2 Display Assembly Replacement, Connecting the Display Cable: step 13, image 1 of 1
      • Connect the display cable and the logo-board cable to the connectors on the system board.

      Ask FixBot

      Add Comment

Conclusion

To reassemble your device, follow these instructions in reverse order.

Cancel: I did not complete this guide.

Terrence15

Member since: 12/18/17

80,125 Reputation

441 Guides authored

Team

RampUP America, Inc. Member of RampUP America, Inc.

Community

45 Members

12,135 Guides authored

0 Guide Comments

Add Comment

View Statistics:

Past 24 Hours: 0

Past 7 Days: 5

Past 30 Days: 42

All Time: 2,082