
Free Shipping on Domestic Orders $75+

Alienware 15 R2 Heatsink Replacement

What you need

  1. Alienware 15 R2 Heatsink Replacement, Heatsink: step 1, image 1 of 2 Alienware 15 R2 Heatsink Replacement, Heatsink: step 1, image 2 of 2
    • Place the laptop upside down and remove the two 9 mm screws with a Phillips #0 screwdriver on the top right and top left of the back panel.

    • Remove the four 18 mm screws with a Phillips #0 screwdriver.

    • Remove the four 10 mm screws with a Phillips #0 screwdriver.

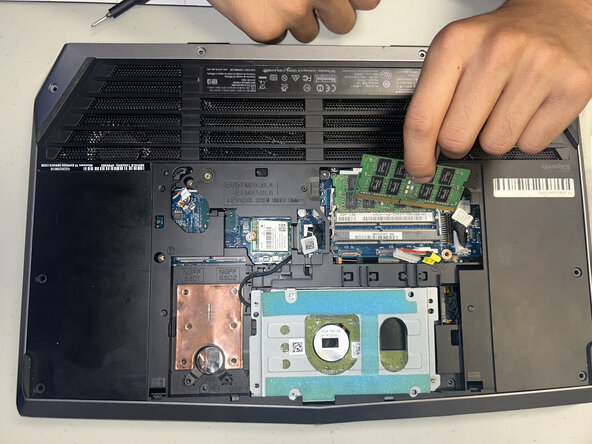
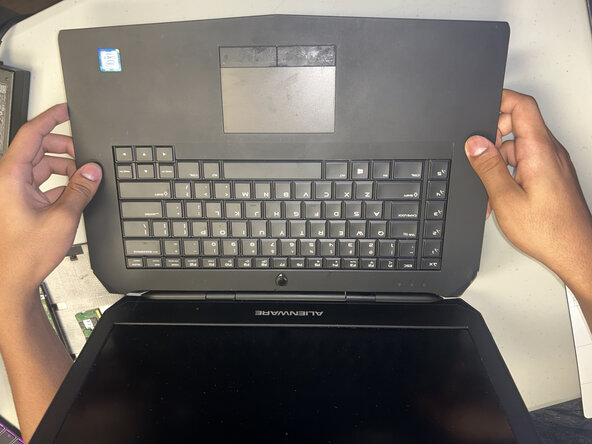
    • Remove the back cover by using the iFixit opening tool to separate it from the back of the laptop and pulling it off.

  2. Alienware 15 R2 Heatsink Replacement: step 2, image 1 of 1
    • Two clips secure each RAM module in place, one on each side. Using your fingers, spread the clips away from the RAM module.

    • Repeat for the second RAM module.

  3. Alienware 15 R2 Heatsink Replacement: step 3, image 1 of 2 Alienware 15 R2 Heatsink Replacement: step 3, image 2 of 2
    • Flip laptop around to keyboard side, then gently pry and lift the keyboard removing the keyboard.

  4. Alienware 15 R2 Heatsink Replacement: step 4, image 1 of 1
    • Using a Phillips #0 screwdriver, remove the screws securing the battery.

  5. Alienware 15 R2 Heatsink Replacement: step 5, image 1 of 1
    • Remove the battery from the housing.

  6. Alienware 15 R2 Heatsink Replacement: step 6, image 1 of 2 Alienware 15 R2 Heatsink Replacement: step 6, image 2 of 2
    • Using a Phillips #0 screwdriver, remove the small 3 mm screws holding the hinges in place.

    • Gently unplug the cables connected to the display.

  7. Alienware 15 R2 Heatsink Replacement: step 7, image 1 of 3 Alienware 15 R2 Heatsink Replacement: step 7, image 2 of 3 Alienware 15 R2 Heatsink Replacement: step 7, image 3 of 3
    • Using a Phillips #0 screwdriver remove the small 6 mm screw on the back of the laptop.

    • The screen may fall after removing the screws.

  8. Alienware 15 R2 Heatsink Replacement: step 8, image 1 of 2 Alienware 15 R2 Heatsink Replacement: step 8, image 2 of 2
    • Using a Phillips #0 remove the small 3 mm screws from the motherboard.

  9. Alienware 15 R2 Heatsink Replacement: step 9, image 1 of 2 Alienware 15 R2 Heatsink Replacement: step 9, image 2 of 2
    • Gently lift the motherboard from the casing.

    • Flip the motherboard to the heatsink side.

  10. Alienware 15 R2 Heatsink Replacement: step 10, image 1 of 2 Alienware 15 R2 Heatsink Replacement: step 10, image 2 of 2
    • Using a Phillips #0 loosen the eight captive screw holding the heatsink to the motherboard

    • The captive screws cannot be fully removed.

  11. Alienware 15 R2 Heatsink Replacement: step 11, image 1 of 2 Alienware 15 R2 Heatsink Replacement: step 11, image 2 of 2
Conclusion

To reassemble your device, follow the above steps in reverse order.
Take your e-waste to an R2 or e-Stewards certified recycler.
Repair didn’t go as planned? Try some basic troubleshooting or ask our Answers community for help.

0 Guide Comments

Add Comment

View Statistics:

Past 24 Hours: 0

Past 7 Days: 3

Past 30 Days: 31

All Time: 136