
Akai MPK25 Keys Replacement

Will Saba and 5 other contributors
Last updated on Jul 22, 2015
Views: 12K
View statistics:
- Past 24 Hours:
- 6
- Past 7 Days:
- 29
- Past 30 Days:
- 151
- All Time:
- 12,251
Comments: 2
2 comments on steps.
Completed: 7 8
7 people have marked this guide "completed." Will you be next?
8 people have marked this guide "completed." Including you — great job!
Favorites: 2 3
2 people have favorited (and subscribed to) this guide. Will you be next?
3 people have favorited (and subscribed to) this guide — including you!
Featured Student Guide
This guide has been the hard work of our awesome students and is found to be exceptionally cool by the iFixit staff.
Introduction
Go to step 1 ↓Use this guide if any of the keys are broken, chipped, or stuck.


-
-
-
Using needle nose pliers, remove the washers from the four corner selector knobs.
-
-
-
Flip the device over. Using a Philips #2 screw driver, remove the fourteen 10.3 mm black screws holding the back panel in place.
-
-
-
Carefully flip the device to the front making sure you secure the face plate and the chassis together.
-
-
-
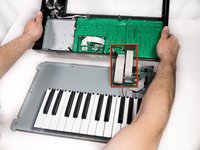
Rotate the device 180 degrees and carefully remove the face plate by slightly lifting the screen side towards you and then sliding the bottom out from under the keys.
-
-
-
-
-
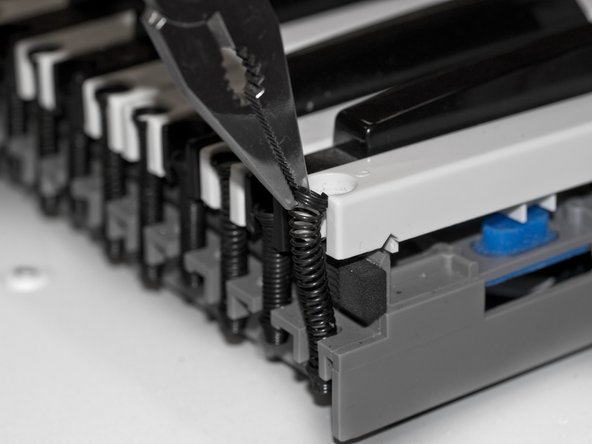
Using needle nose pliers, grip the top of the spring coil, that is holding down the key, and gently lift the spring away from the key.
-
-
-
Lift the key from the front of the keyboard towards the back in order to remove it completely.
-
-

 Ask FixBot









To reassemble the keyboard and close up the case, follow these instructions in reverse order.
Cancel: I did not complete this guide.
7 other people completed this guide.

Team

Cal Poly, Team 20-6, Maness Winter 2013 Member of Cal Poly, Team 20-6, Maness Winter 2013
CPSU-MANESS-W13S20G6
5 Members
72 Guides authored
