Free Shipping on Domestic Orders $75+

Air Hog Smash Bots Front Panel Replacement

What you need

    1. Air Hog Smash Bots Front Panel Replacement, Front Panel: step 1, image 1 of 2 Air Hog Smash Bots Front Panel Replacement, Front Panel: step 1, image 2 of 2
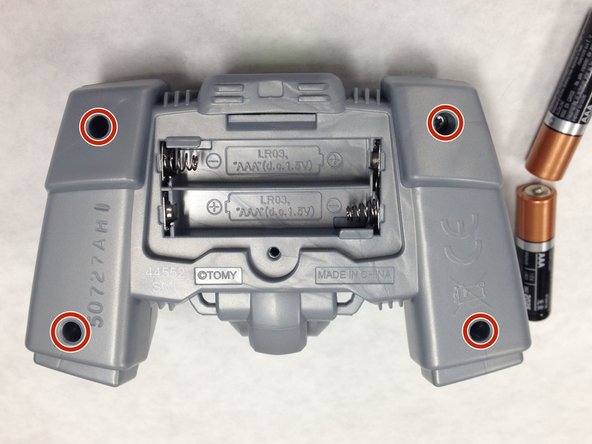
      • Take out your controller and access to the back of the controller.

      Ask FixBot

      Add Comment

    2. Air Hog Smash Bots Front Panel Replacement: step 2, image 1 of 1
      • Remove the screw on the battery lid. Using the Hex 4 socket and PH #0 bit, remove the 8 mm screw.

      Ask FixBot

      Add Comment

    3. Air Hog Smash Bots Front Panel Replacement: step 3, image 1 of 1
      • Remove the 2 AAA batteries.

      Ask FixBot

      Add Comment

    4. Air Hog Smash Bots Front Panel Replacement: step 4, image 1 of 2 Air Hog Smash Bots Front Panel Replacement: step 4, image 2 of 2
      • Using the Hex 4 socket and PH #0 bit, remove the four 8 mm screws on the panel.

      Ask FixBot

      Add Comment

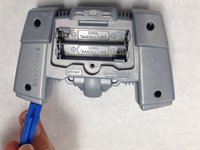
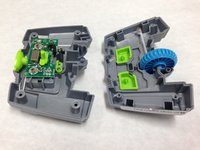
    5. Air Hog Smash Bots Front Panel Replacement: step 5, image 1 of 2 Air Hog Smash Bots Front Panel Replacement: step 5, image 2 of 2
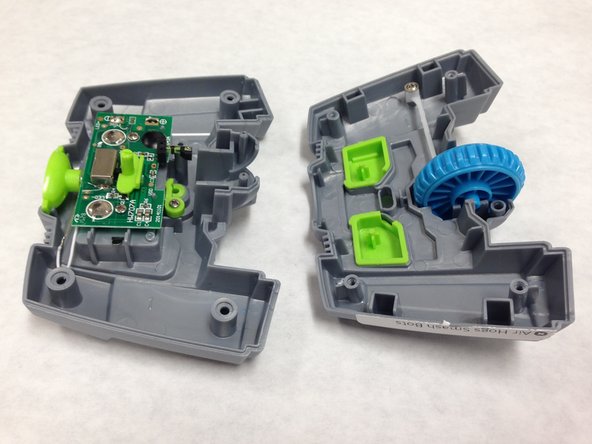
      • Use the plastic opening tool to disconnect the front and back parts of the panel.

      • Some of the internal components may be displaced when opening the controller.

      Ask FixBot

      Add Comment

Conclusion

To reassemble your device, follow these instructions in reverse order.

Cancel: I did not complete this guide.

Jiani Xie

Member since: 02/08/16

173 Reputation

1 Guide authored

Team

IUPUI, Team 1-1, Baechle Spring 2016 Member of IUPUI, Team 1-1, Baechle Spring 2016

IUPUI-BAECHLE-S16S1G1

4 Members

28 Guides authored

0 Guide Comments

Add Comment

View Statistics:

Past 24 Hours: 0

Past 7 Days: 7

Past 30 Days: 31

All Time: 496