Introduction
This guide shows how to replace the SSD in an Acer Swift X N20C12. The SSD is the storage device of the laptop. Its form factor is 2280 M.2.
You may want to replace your SSD if your current one is suffering performance issues or corruption from reaching its end of life (SSDs can only be read from/written to a limited number of times).
When replacing your SSD make sure to backup the data that was on the old one, since the new one will be blank.
What you need
-
-
-
Use a T5 Torx screwdriver to remove the eleven screws that secure the lower case.
 Ask FixBot
-
-
-
Insert an opening pick in the seam between the lower case and chassis.
-
Slide the pick around the perimeter while prying until the lower case releases.
-
Remove the lower case.
-
-
-
-
-
-
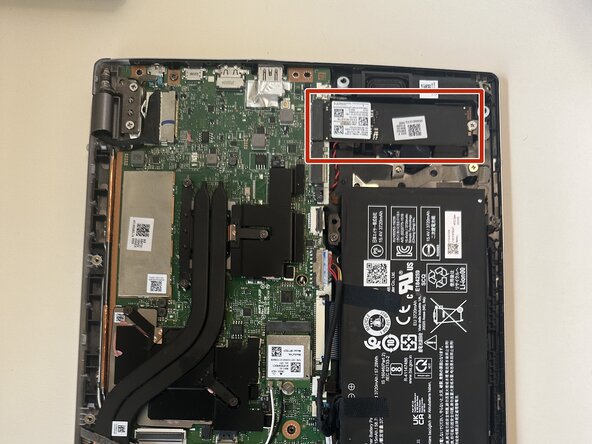
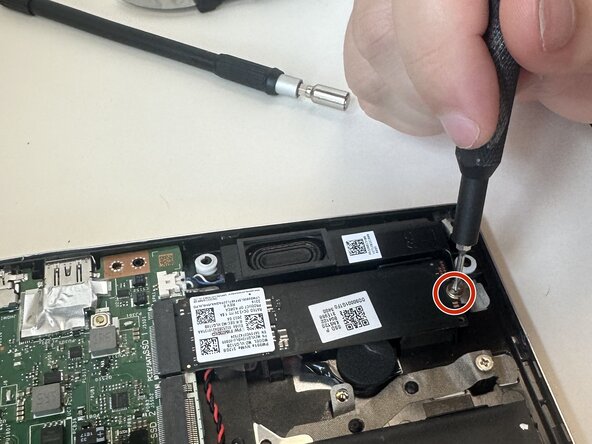
Use a Phillips screwdriver end to remove the 5 mm screw that secures the SSD.
-
-
-
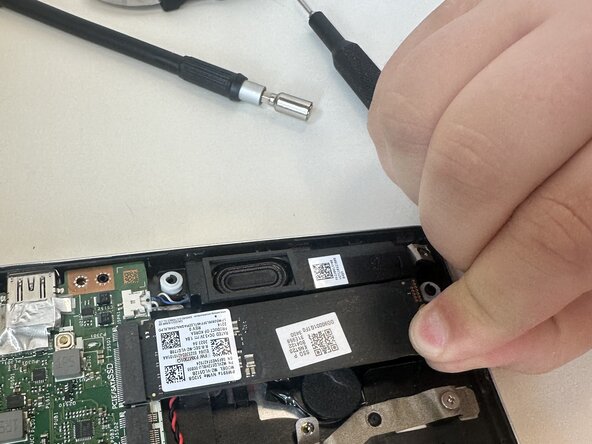
Gently remove the SSD from the computer by pulling it straight out of its motherboard socket.
-


To reassemble your device, follow the above steps in reverse order.
Take your e-waste to an R2 or e-Stewards certified recycler.
Repair didn’t go as planned? Try some basic troubleshooting or ask our Answers community for help.

Team

Austin Community College, Team 22-3, Watkins Summer 2025 Member of Austin Community College, Team 22-3, Watkins Summer 2025
AUSTINCC-WATKINS-SU25S22G3
4 Members
58 Guides authored
