
Acer Swift X N20C12 Display Assembly Replacement

Abrar and 4 other contributors
Last updated on Dec 28, 2023
Views: 1.1K
View statistics:
- Past 24 Hours:
- 2
- Past 7 Days:
- 15
- Past 30 Days:
- 69
- All Time:
- 1,063
Comments: 0
No one has left comments on this guide. Will you be first?
Go to guide commentsCompleted: 0 1
No one has marked this guide "completed." Will you be the first?
1 person has marked this guide "completed." It's you — great job!
Favorites: 0 1
No one has favorited (and subscribed to) this guide. Will you be the first?
1 person has favorited (and subscribed to) this guide — and that's you!
Needs More Images
A few more images would make this guide's procedures crystal clear.
Needs Better Images
Better photos will improve this guide. Help out by taking, editing, or uploading new ones!
Introduction
Go to step 1 ↓If you have display assembly , Whether you've encountered a cracked screen, malfunctioning display, or other issues with your laptop or monitor, this step-by-step walkthrough will help you replace the display assembly and get your device back to optimal working condition. With detailed instructions and tips, we'll guide you through the process, ensuring a smooth and successful replacement of your display assembly.
What you need
Tools


-
-
-
Use a T5 Torx screwdriver to remove the eleven screws that secure the lower case.
 Ask FixBot
-
-
-
Insert an opening pick in the seam between the lower case and chassis.
-
Slide the pick around the perimeter while prying until the lower case releases.
-
Remove the lower case.
-
-
-
-
-
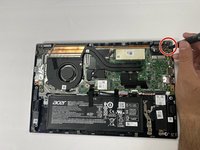
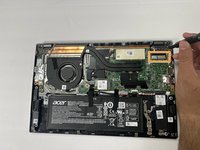
Use a Phillips #1 screwdriver to remove the 5.5 mm screws securing the hinges.
-
Disconnect the display cable.
-
-
-



To reassemble your device, follow these instructions in reverse order.

Team

Gateway, Team 1-2, Pee Fall 2023 Member of Gateway, Team 1-2, Pee Fall 2023
GCC-PEE-F23S1G2
5 Members
60 Guides authored
