Free Shipping on Domestic Orders $75+

Acer Iconia Tab A500 Screen Replacement

What you need

  1. Acer Iconia Tab A500 Screen Replacement, Back Case: step 1, image 1 of 1
    • To start, gently separate one corner of the case using the black spudger.

    Ask FixBot

    Add Comment

  2. Acer Iconia Tab A500 Screen Replacement: step 2, image 1 of 1
    • Once you have successfully pried the spudger in between the front case and back case, continue do so around the entire tablet until the back case is completely disconnected.

    Ask FixBot

    Add Comment

  3. Acer Iconia Tab A500 Screen Replacement, Battery: step 3, image 1 of 1
    • Remove the 5mm screws that are securing the battery to the rest of the tablet.

    • Use the Phillips #00 Screwdriver to remove the 5mm screws.

    Ask FixBot

    Add Comment

  4. Acer Iconia Tab A500 Screen Replacement: step 4, image 1 of 1
    • Use the sharper end of the spudger to disconnect the battery from the mother board.

    • The battery connector will slide off.

    Ask FixBot

    Add Comment

  5. Acer Iconia Tab A500 Screen Replacement, Speakers: step 5, image 1 of 1
    • Locate the 4 screws and cable that hold in the two speakers.

    • Use the Phillips #1 screwdriver to remove these 2mm black screws.

    • Remove the 2mm silver screws.

    • Not all 4 screws are going to be the same kind. This will not affect the speaker replacement.

    Ask FixBot

    Add Comment

  6. Acer Iconia Tab A500 Screen Replacement: step 6, image 1 of 2 Acer Iconia Tab A500 Screen Replacement: step 6, image 2 of 2
    • Carefully remove the connector cable by pushing on the rim of black plastic insert.

    Ask FixBot

    Add Comment

  7. Acer Iconia Tab A500 Screen Replacement: step 7, image 1 of 1
    • Unfortunately, the top speaker is a wedged under the motherboard.

    • To get this speaker out, use the spudger and gently pry it out.

    Ask FixBot

    Add Comment

  8. Acer Iconia Tab A500 Screen Replacement, Power Button: step 8, image 1 of 1
    • Using the Phillips #1 screwdriver, remove the screws near the edges of the tablet.

    • They may be different sizes, the silver are 5mm and the black are 2mm.

    Ask FixBot

    Add Comment

  9. Acer Iconia Tab A500 Screen Replacement: step 9, image 1 of 1
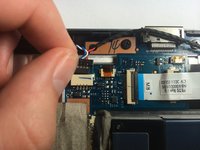
    • Lift up on the black flaps to release the flat cables.

    • Pull this Connector off.

    Ask FixBot

    Add Comment

  10. Acer Iconia Tab A500 Screen Replacement: step 10, image 1 of 1
    • Use the spudger to detach the indicated cables.

    • Remove the last motherboard screw under the rightmost cable. It is a silver 5mm.

    Ask FixBot

    Add Comment

  11. Acer Iconia Tab A500 Screen Replacement: step 11, image 1 of 1
    • Disconnect the two gold connectors by pulling straight up on them with your fingers.

    • Like before, lift up on the black flap to detach the cable.

    Ask FixBot

    Add Comment

  12. Acer Iconia Tab A500 Screen Replacement: step 12, image 1 of 1
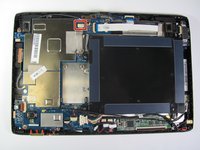
    • Having disconnected all those pesky cables, the motherboard lifts cleanly out.

    Ask FixBot

    Add Comment

  13. Acer Iconia Tab A500 Screen Replacement, Screen: step 13, image 1 of 1
    • Remove this components near the edge of the tablet by unscrewing the 5mm screw holding the top in place.

    Ask FixBot

    Add Comment

  14. Acer Iconia Tab A500 Screen Replacement: step 14, image 1 of 1
    • Lift the silver case, exposing the back side of the screen.

    Ask FixBot

    Add Comment

  15. Acer Iconia Tab A500 Screen Replacement: step 15, image 1 of 1
    • Use the spudger to pry off the screen, it is held in by a film of glue around the rim.

    Ask FixBot

    Add Comment

  16. Acer Iconia Tab A500 Screen Replacement: step 16, image 1 of 1
    • Swap the screen and you're finished!

    Ask FixBot

    Add Comment

Conclusion

To reassemble your device, follow these instructions in reverse order.

Cancel: I did not complete this guide.

7 other people completed this guide.

Kyle Libby

Member since: 04/07/14

1,006 Reputation

7 Guides authored

Team

Cal Poly, Team 7-23, Regan Spring 2014 Member of Cal Poly, Team 7-23, Regan Spring 2014

CPSU-REGAN-S14S7G23

4 Members

19 Guides authored

0 Guide Comments

Add Comment

View Statistics:

Past 24 Hours: 2

Past 7 Days: 11

Past 30 Days: 43

All Time: 13,515