Free Shipping on Domestic Orders $75+

Acer Iconia B1-720 Battery Replacement

What you need

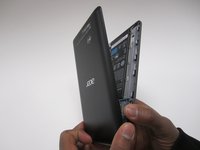
  1. Acer Iconia B1-720 Battery Replacement, Rear Case: step 1, image 1 of 3 Acer Iconia B1-720 Battery Replacement, Rear Case: step 1, image 2 of 3 Acer Iconia B1-720 Battery Replacement, Rear Case: step 1, image 3 of 3
    • Insert a plastic opening tool into a gap near the charging port at the top of the device. Slide the tool in either direction along the device.

    Ask FixBot

    Add Comment

  2. Acer Iconia B1-720 Battery Replacement: step 2, image 1 of 3 Acer Iconia B1-720 Battery Replacement: step 2, image 2 of 3 Acer Iconia B1-720 Battery Replacement: step 2, image 3 of 3
    • Slide the tool along until you have completely separated the rear cover.

    • If needed, place the first tool in the gap created to hold this gap open and use a second tool to pry the remaining portion of the rear cover off.

    Ask FixBot

    Add Comment

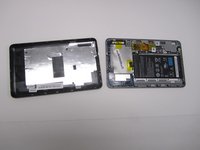
  3. Acer Iconia B1-720 Battery Replacement: step 3, image 1 of 2 Acer Iconia B1-720 Battery Replacement: step 3, image 2 of 2
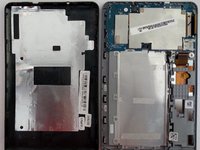
    • Once all the sides have been separated, you should be able to simply lift the cover off of the device.

    Ask FixBot

    Add Comment

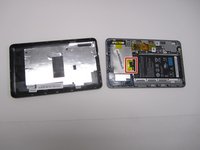
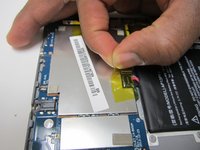
  4. Acer Iconia B1-720 Battery Replacement, Battery: step 4, image 1 of 2 Acer Iconia B1-720 Battery Replacement, Battery: step 4, image 2 of 2
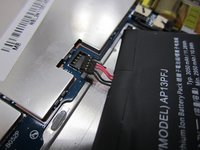
    • Peel back the plastic tape covering the battery connector.

    Ask FixBot

    Add Comment

  5. Acer Iconia B1-720 Battery Replacement: step 5, image 1 of 1
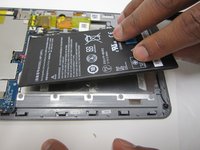
    • Use the plastic opening tool to lift the battery off of the back panel. The adhesive used is strong so apply force during removal.

    Ask FixBot

    Add Comment

  6. Acer Iconia B1-720 Battery Replacement: step 6, image 1 of 3 Acer Iconia B1-720 Battery Replacement: step 6, image 2 of 3 Acer Iconia B1-720 Battery Replacement: step 6, image 3 of 3
    • Lift the battery off of the panel gently. This will disconnect the battery connector from the motherboard.

    Ask FixBot

    Add Comment

Conclusion

To reassemble your device, follow these instructions in reverse order.

Cancel: I did not complete this guide.

5 other people completed this guide.

Kervis Boston

Member since: 03/18/15

479 Reputation

3 Guides authored

Team

2 Guide Comments

Why the battery has a 4 pin connector? I tried to buy another generic battery but it got only 2 cables, don't know how to replace :(

Tadeu - Reply Share

I just wanted to throw a red flag out there…I broke my connector off the motherboard trying to reinstall the four-pin connection…can anyone advise?

John Merritt - Reply Share

Add Comment

View Statistics:

Past 24 Hours: 2

Past 7 Days: 5

Past 30 Days: 28

All Time: 3,176