Free Shipping on Domestic Orders $75+

Acer Aspire One ZG5 Hard Drive Replacement

What you need

  1. Acer Aspire One ZG5 Hard Drive Replacement, Battery: step 1, image 1 of 1
    • Turn the netbook upside down with the battery at the top, facing away from you.

    Ask FixBot
  2. Acer Aspire One ZG5 Hard Drive Replacement: step 2, image 1 of 1
    • Unlock the battery by sliding the switch located near the left hinge to the left "unlocked" position.

    Ask FixBot
  3. Acer Aspire One ZG5 Hard Drive Replacement: step 3, image 1 of 1
    • Slide the latch located on the opposite hinge from the lock while pushing the battery up.

    Ask FixBot
  4. Acer Aspire One ZG5 Hard Drive Replacement, Wireless Card: step 4, image 1 of 1
    • Gently loosen the two Phillips #0 screws in the small panel that covers the wireless card.

    • These screws are built into the panel and aren't meant to be completely removed.

    Ask FixBot
  5. Acer Aspire One ZG5 Hard Drive Replacement: step 5, image 1 of 1
    • Lift up the panel and remove it from the case.

    Ask FixBot
  6. Acer Aspire One ZG5 Hard Drive Replacement: step 6, image 1 of 1
    • Disconnect the two antenna cables from the left side of the wireless card.

    Ask FixBot
  7. Acer Aspire One ZG5 Hard Drive Replacement: step 7, image 1 of 1
    • Remove the single 3.9 mm Phillips #1 screw from the bottom left of the wireless card.

    Ask FixBot
  8. Acer Aspire One ZG5 Hard Drive Replacement: step 8, image 1 of 1
    • Gently lift up the left side of the wireless card and slide the card out of its socket.

    Ask FixBot
  9. Acer Aspire One ZG5 Hard Drive Replacement, Keyboard: step 9, image 1 of 1
    • Turn the netbook over and open the display so that the keyboard is facing you.

    Ask FixBot
  10. Acer Aspire One ZG5 Hard Drive Replacement: step 10, image 1 of 3 Acer Aspire One ZG5 Hard Drive Replacement: step 10, image 2 of 3 Acer Aspire One ZG5 Hard Drive Replacement: step 10, image 3 of 3
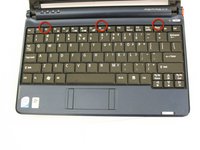
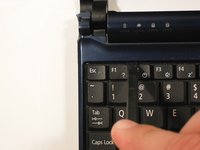
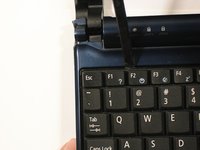
    • There are three tabs located on the top of the keyboard.

    • Start with the spudger pointing towards the display and pry up to push each tab off the keyboard.

    • As you move to the next tab, ensure the previous tab doesn't reset itself.

    Ask FixBot
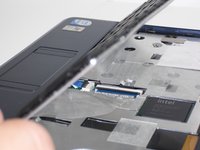
  11. Acer Aspire One ZG5 Hard Drive Replacement: step 11, image 1 of 2 Acer Aspire One ZG5 Hard Drive Replacement: step 11, image 2 of 2
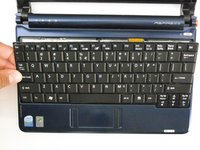
    • Lift top of keyboard up. If it doesn't lift easily, there may be tabs on the sides - use the tool to ease them aside and/or shift the keyboard from side to side.
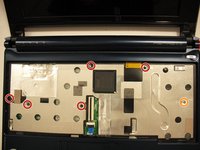
    • There is a short ribbon cable connecting the keyboard to the netbook.

    Ask FixBot
  12. Acer Aspire One ZG5 Hard Drive Replacement: step 12, image 1 of 2 Acer Aspire One ZG5 Hard Drive Replacement: step 12, image 2 of 2
    • Disconnect the ribbon by lifting the black plastic hinge and removing the clear blue cable.

    Ask FixBot
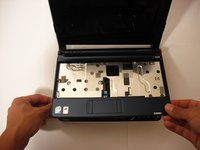
  13. Acer Aspire One ZG5 Hard Drive Replacement, Top Case: step 13, image 1 of 1
    • Close the display and turn the ZG5 over so that the battery compartment faces away from you.

    Ask FixBot
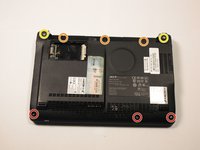
  14. Acer Aspire One ZG5 Hard Drive Replacement: step 14, image 1 of 2 Acer Aspire One ZG5 Hard Drive Replacement: step 14, image 2 of 2
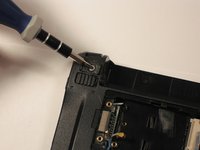
    • Remove three 5.8 mm Phillips #0 screws from the bottom of the case

    • Remove three 3.9 mm Phillips #1 screws from the battery compartment.

    • Remove two 5.8 mm Phillips #0 screws from underneath the feet near the hinges.

    Ask FixBot
  15. Acer Aspire One ZG5 Hard Drive Replacement: step 15, image 1 of 1
    • Turn the netbook back over and open the display with the keyboard cavity facing you.

    Ask FixBot
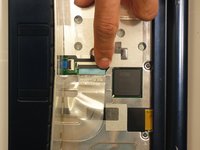
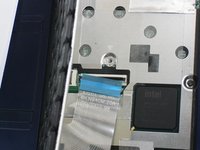
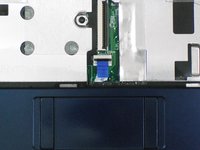
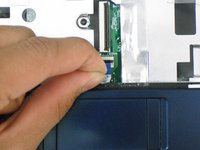
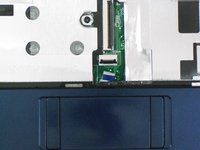
  16. Acer Aspire One ZG5 Hard Drive Replacement: step 16, image 1 of 3 Acer Aspire One ZG5 Hard Drive Replacement: step 16, image 2 of 3 Acer Aspire One ZG5 Hard Drive Replacement: step 16, image 3 of 3
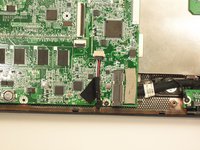
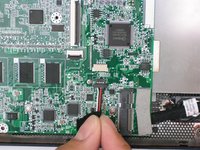
    • Flip up the retaining flap on the trackpad ribbon cable ZIF connector.

    • Using the blue tab, pull the trackpad ribbon cable from its socket on the motherboard.

    Ask FixBot
  17. Acer Aspire One ZG5 Hard Drive Replacement: step 17, image 1 of 2 Acer Aspire One ZG5 Hard Drive Replacement: step 17, image 2 of 2
    • Remove the five black 4.7 mm Phillips #0 screws from the metal casing.

    • Remove the single silver 4.3 mm Phillips #00 screw from the right side of the metal casing.

    Ask FixBot
  18. Acer Aspire One ZG5 Hard Drive Replacement: step 18, image 1 of 2 Acer Aspire One ZG5 Hard Drive Replacement: step 18, image 2 of 2
    • Starting at the red rings along the hinge, insert a spudger or plastic opening tool into the seam between the two halves of the case.

    • Slide the spudger toward the front of the device, releasing the small clips that hold down the top case.

    • Gently lift off the top case.

    Ask FixBot
  19. Acer Aspire One ZG5 Hard Drive Replacement, Internal Wireless Card: step 19, image 1 of 1
    • Disconnect the two antenna cables from the right side of the wireless card.

    Ask FixBot
  20. Acer Aspire One ZG5 Hard Drive Replacement: step 20, image 1 of 1
    • Remove the single 3.9 mm Phillips #1 screw from the wireless card.

    Ask FixBot
  21. Acer Aspire One ZG5 Hard Drive Replacement: step 21, image 1 of 1
    • Gently pull the wireless card to the right and slide it out of its socket.

    Ask FixBot
  22. Acer Aspire One ZG5 Hard Drive Replacement, Motherboard: step 22, image 1 of 1
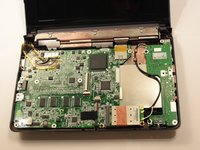
    • Disconnect the display cable from the top left of the motherboard.

    Ask FixBot
  23. Acer Aspire One ZG5 Hard Drive Replacement: step 23, image 1 of 2 Acer Aspire One ZG5 Hard Drive Replacement: step 23, image 2 of 2
    • Disconnect the speaker cable from its socket on the motherboard.

    Ask FixBot
  24. Acer Aspire One ZG5 Hard Drive Replacement: step 24, image 1 of 1
    • Remove three 3.9 mm Phillips #1 screws from the small I/O board.

    • Remove a single 3.9 mm Phillips #0 screw from the front of the motherboard.

    • Some laptops may instead have a single 4.7 mm Phillips #0 screw.

    Ask FixBot
  25. Acer Aspire One ZG5 Hard Drive Replacement: step 25, image 1 of 1
    • Remove the two 4.7 mm Phillips #1 screws that connect the display to the motherboard.

    Ask FixBot
  26. Acer Aspire One ZG5 Hard Drive Replacement: step 26, image 1 of 1
    • Gently lift the I/O board up from the right side of the case.

    • The I/O board is attached to the motherboard by a short cable.

    Ask FixBot
  27. Acer Aspire One ZG5 Hard Drive Replacement: step 27, image 1 of 1
    • Lift the entire motherboard assembly out the case.

    Ask FixBot
  28. Acer Aspire One ZG5 Hard Drive Replacement, Hard Drive: step 28, image 1 of 1
    • Turn the motherboard over so that the RAM is facing up.

    Ask FixBot
  29. Acer Aspire One ZG5 Hard Drive Replacement: step 29, image 1 of 2 Acer Aspire One ZG5 Hard Drive Replacement: step 29, image 2 of 2
    • Disconnect the I/O board from the motherboard.

    Ask FixBot
  30. Acer Aspire One ZG5 Hard Drive Replacement: step 30, image 1 of 1
    • Remove the two 4.7 mm Phillips #0 screws that hold down the hard drive.

    Ask FixBot
  31. Acer Aspire One ZG5 Hard Drive Replacement: step 31, image 1 of 1
    • Pull the hard drive straight out from the motherboard.

    Ask FixBot
  32. Acer Aspire One ZG5 Hard Drive Replacement: step 32, image 1 of 1
    • Remove the four 3.9 mm Phillips #1 screws from the hard drive casing.

    • There are two screws on each side of the casing.

    Ask FixBot
  33. Acer Aspire One ZG5 Hard Drive Replacement: step 33, image 1 of 1
    • Remove the upper and lower casing from the hard drive.

    Ask FixBot
Conclusion

To reassemble your device, follow these instructions in reverse order.

114 other people completed this guide.

Doug Gallatin

Member since: 10/05/10

6,385 Reputation

10 Guides authored

Team

Cal Poly, Team 7-49, Amido Fall 2010 Member of Cal Poly, Team 7-49, Amido Fall 2010

CPSU-AMIDO-F10S7G49

5 Members

34 Guides authored

14 Guide Comments

Excellent guide. This "student" should be promoted to "instructor" right away. Many thanks.

Rudy Fernandes - Reply Share
This guide helped a lot with refurbishing my old ZG5. It now has a case that is not cracked, 1.5 GB memory, and a 240GB SSD. I get to put off Windows 10 for a while longer.

James Stallings - Reply Share

Thanks a lot! i already upgrade memory from 1 to 1.5 on my acer. But i have a question, does the aoa 150 works faster with a ssd disk? i want to try with one of 240 gb. Anyone try it?

Martiniano Vera Enrique - Reply Share

Not the easiest upgrade I've ever done (perhaps the most difficult, actually), but I got it done. Removing the keyboard was the trickiest step for me. Be patient. If you can work one of the corner releases, you can put a flat-blade screwdriver under the corner of the keyboard and work on the other releases (starting at the far corner, then the centre).

The other tricky problem I had was getting the little ribbon cable for the trackpad properly reconnected after completing the project. (I thought the keyboard cable would be the tricky part, but it turns out to be pretty easy.) Be patient and you'll be fine. You may want to test (with a mouse handy) before you reinsert the keyboard.

Thanks very much for this howto!

Jim MacKenzie - Reply Share

I had one of these little beasts that my son gave away about 6 years ago. The person he gave it to returned it to him a month later because it would not turn on. It was a case of the boot sector problem that plagues the ZG5. I performed the repair described on the Acer web site and it has been running fine ever since. After installing Linux Mint (dual boot), it was finally given away again last summer. Now it seems it is coming back to me. This might be the time to upgrade it with an SSD. Thanks for this tutorial. I will probably be making use of it over the next few weeks.

Chuck Pilger - 02/23/2017

Chuck Pilger - Reply Share

Add Comment

View Statistics:

Past 24 Hours: 12

Past 7 Days: 71

Past 30 Days: 326

All Time: 285,266