Free Shipping on Domestic Orders $75+

Acer Aspire 5742G Memory stick Replacement

What you need

Video Overview

click here for video

    1. Acer Aspire 5742G Memory stick Replacement, Memory stick: step 1, image 1 of 1
      • Make sure your computer is off and remove the battery with the security tabs shown in the picture

      Ask FixBot

      Add Comment

    2. Acer Aspire 5742G Memory stick Replacement: step 2, image 1 of 1
      • Remove these philips screws, only two :)

      Ask FixBot

      Add Comment

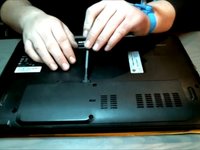
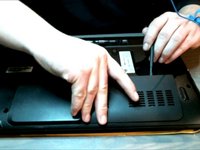
    3. Acer Aspire 5742G Memory stick Replacement: step 3, image 1 of 2 Acer Aspire 5742G Memory stick Replacement: step 3, image 2 of 2
      • Then from the dented tab, either your finger, card or spudger will work, and start prying GENTLY!

      • Easily work your way around.

      • WARNING! PLASTIC TABS! be careful not to break them!

      Ask FixBot

      Add Comment

    4. Acer Aspire 5742G Memory stick Replacement: step 4, image 1 of 1
      • Now you've removed the cover, you will get access to your Antenna, HDD, and RAM

      • Please remove both tabs with the memory stick at the same time

      Ask FixBot

      Add Comment

    5. Acer Aspire 5742G Memory stick Replacement: step 5, image 1 of 1
      • Now put the new memory stick in!

      • When it is in, then gently push it downwards to lock it in place!

      • Be aware you have to line up the stick with a pin in the socket!!

      Ask FixBot

      Add Comment

Conclusion

To reassemble your device, follow these instructions in reverse order.

Cancel: I did not complete this guide.

2 other people completed this guide.

Petter Berget

Member since: 05/12/15

794 Reputation

2 Guides authored

Team

Kid fixers Member of Kid fixers

Community

221 Members

2,046 Guides authored

0 Guide Comments

Add Comment

View Statistics:

Past 24 Hours: 13

Past 7 Days: 29

Past 30 Days: 61

All Time: 1,373