Free Shipping on Domestic Orders $75+

Acer Aspire 5251-1513 RAM Replacement

What you need

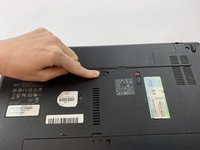
    1. Acer Aspire 5251-1513 RAM Replacement, Battery: step 1, image 1 of 1
      • Turn over the laptop so the back is facing up.

      Ask FixBot

      Add Comment

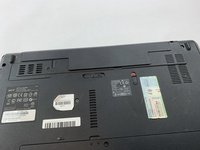
    2. Acer Aspire 5251-1513 RAM Replacement: step 2, image 1 of 2 Acer Aspire 5251-1513 RAM Replacement: step 2, image 2 of 2
      • Next to the battery is a switch with a lock symbol on it.

      • Unlock the switch by sliding it to reveal a red unlock symbol.

      Ask FixBot

      Add Comment

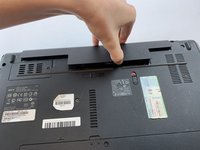
    3. Acer Aspire 5251-1513 RAM Replacement: step 3, image 1 of 2 Acer Aspire 5251-1513 RAM Replacement: step 3, image 2 of 2
      • Pull the other switch completely while the red unlock symbol is still present. The battery pack should pop up a bit.

      Ask FixBot

      Add Comment

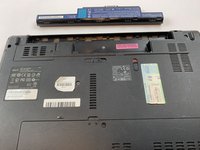
    4. Acer Aspire 5251-1513 RAM Replacement: step 4, image 1 of 2 Acer Aspire 5251-1513 RAM Replacement: step 4, image 2 of 2
      • Remove the battery pack via the indentation at the top of the battery in between the two switches.

      Ask FixBot

      Add Comment

    1. Acer Aspire 5251-1513 RAM Replacement, RAM: step 5, image 1 of 1
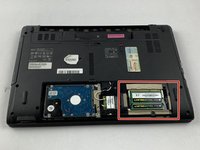
      • Unscrew the two 8.6 mm screws using a Phillips #0 screwdriver.

      Ask FixBot

      Add Comment

    2. Acer Aspire 5251-1513 RAM Replacement: step 6, image 1 of 1
      • Use a spudger or plastic opening tool to lift the panel up. Then remove the panel entirely with your hands.

      Ask FixBot

      Add Comment

    3. Acer Aspire 5251-1513 RAM Replacement: step 7, image 1 of 3 Acer Aspire 5251-1513 RAM Replacement: step 7, image 2 of 3 Acer Aspire 5251-1513 RAM Replacement: step 7, image 3 of 3
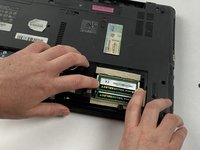
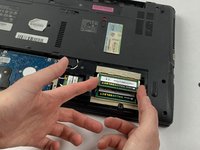
      • Find two metal pieces on either side of the RAM.

      • Pull the two tabs apart. The RAM will pop up when released.

      Ask FixBot

      Add Comment

    4. Acer Aspire 5251-1513 RAM Replacement: step 8, image 1 of 1
      • Gently pull the RAM out

      • Please be careful pulling out the RAM, only touch the edges.

      • Repeat step 8 & 9 for the second RAM piece if applicable.

      Ask FixBot

      Add Comment

Conclusion

To reassemble your device, follow these instructions in reverse order.

Cancel: I did not complete this guide.

One other person completed this guide.

Gicely Rodriguez

Member since: 02/14/19

1,152 Reputation

5 Guides authored

Team

USF Tampa, Team S1-G6, Leahy Spring 2019 Member of USF Tampa, Team S1-G6, Leahy Spring 2019

USFT-LEAHY-S19S1G6

4 Members

60 Guides authored

0 Guide Comments

Add Comment

View Statistics:

Past 24 Hours: 1

Past 7 Days: 12

Past 30 Days: 63

All Time: 1,387