Introduction
This guide will lead you through the steps of removing the USB Add-on Card attached on the motherboard.
What you need
-
-
Locate and remove the 5 screws that secure the panel over the RAM and CPU cover on the upper right hand side. These can be found in the center towards the corner opposite the battery compartment.
 Ask FixBot
-
-
-
Remove the two Phillips screws securing the fan.
-
Carefully disconnect the fan cable from the motherboard.
-
Lift up and remove the fan.
-
-
-
Open and push the screen back all the way until it is horizontal with the rest of the laptop.
-
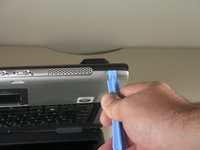
Use an opening tool to remove the panel above the keyboard that has the power button on it.
-
After you have released the tabs, lift up the panel.
-
-
-
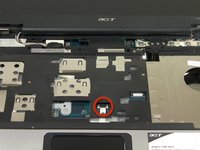
Under the panel, remove the two screws that connect the keyboard to the laptop.
-
-
-
Release the catch on the ribbon socket by sliding the two tabs toward the ribbon.
-
Pull the ribbon under the keyboard to detach it from the motherboard.
-
Remove the keyboard.
-
-
-
-
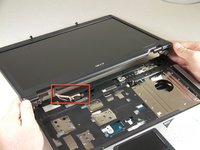
Open the lid of the laptop and locate the cover that surrounds the keyboard and track pad.
-
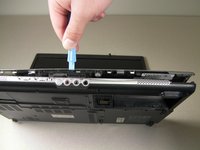
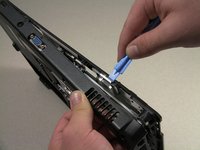
Use the spudger to pry open the sides of this cover.
-
-
-
Slightly lift up the cover to see the ribbon connection.
-
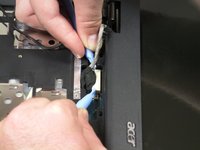
Release the catch by sliding the two lugs toward the ribbon, then pull the ribbon to detach it from the motherboard.
-
Lift up the cover from the laptop.
-
-
-
On the cover that was removed, flip it around and locate where the back of the track pad is.
-
Remove the three screws located at the corners.
-
Lift up the bracket that you just unscrewed and remove track pad.
-
-
-
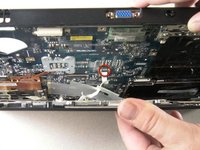
Detach the white rectangle located on the motherboard at the end of the wire connected to the LCD screen.
-
-
-
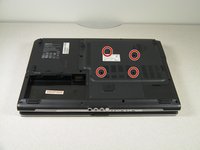
Flip the laptop upside down.
-
Remove the four screws from the back panel of the laptop.
-
Lift the panel up and set it aside.
-
-
-
Flip the laptop upside down.
-
Locate the heat sink, which is the copper "L" shaped component, and unscrew the four screws that connect it to the motherboard.
-
-
-
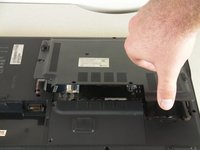
Push out the back of the casing by the VGA connector to remove the motherboard.
-
-
-
Lift up and remove the motherboard from the laptop casing.
-
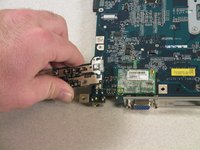
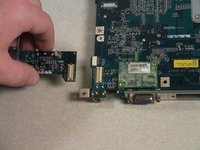
Remove the USB add-on card to use it with the new motherboard.
-


To reassemble your device, follow these instructions in reverse order.
Cancel: I did not complete this guide.
2 other people completed this guide.
Team

Cal Poly, Team 14-39, Forte Fall 2010 Member of Cal Poly, Team 14-39, Forte Fall 2010
CPSU-FORTE-F10S14G39
5 Members
10 Guides authored
1 Guide Comment
اello
I have a problem at all entrances usb not working
When Enter the device show me unknown device
The show I've been arrested for this device that caused the problem (code 43)
I did not understand the problem, despite all attempts
Where do I start testing now, sir
I hope to answer in the near future sir
Thank you