
Acer Aspire 5100 Track Pad Replacement

Brad Rollinson and 10 other contributors
Last updated on Jun 15, 2021
Views: 10K
View statistics:
- Past 24 Hours:
- 1
- Past 7 Days:
- 17
- Past 30 Days:
- 98
- All Time:
- 10,235
Comments: 8
5 comments on steps, 3 guide comments.
Go to guide commentsCompleted: 2 3
2 people have marked this guide "completed." Will you be next?
3 people have marked this guide "completed." Including you — great job!
Favorites: 10 11
10 people have favorited (and subscribed to) this guide. Will you be next?
11 people have favorited (and subscribed to) this guide — including you!
Introduction
Go to step 1 ↓If your Acer Aspire 5100 track pad is not always clicking or not clicking at all, use this guide to replace the track pad.
The trackpad of this device allows the user to move the cursor using their fingers and use the clicking function to select wanted features on the screen. A faulty trackpad can cause the Acer Aspire 5100 to have a jittery cursor, loss of cursor control, or loss of the clicking function on the trackpad.
Before replacing the trackpad, inspect the trackpad connection as well as any debris that might be in the surrounding areas. Occasionally dust can build up and cause connection issues in the track pad.
Once the surrounded areas have been inspected, use this guide to replace the track pad on your Acer Aspire 5100. Be sure the the device is powered down and unplugged from any external power sources.
What you need


-
-
-
Open and push the screen back all the way until it is horizontal with the rest of the laptop.
-
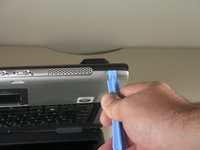
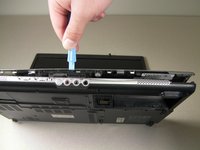
Use an opening tool to remove the panel above the keyboard that has the power button on it.
-
After you have released the tabs, lift up the panel.
 Ask FixBot
-
-
-
Under the panel, remove the two screws that connect the keyboard to the laptop.
-
-
-
Release the catch on the ribbon socket by sliding the two tabs toward the ribbon.
-
Pull the ribbon under the keyboard to detach it from the motherboard.
-
Remove the keyboard.
-
-
-
-
-
Open the lid of the laptop and locate the cover that surrounds the keyboard and track pad.
-
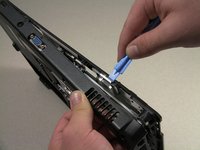
Use the spudger to pry open the sides of this cover.
-
-
-
-
Slightly lift up the cover to see the ribbon connection.
-
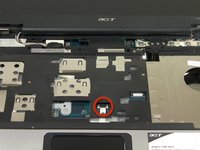
Release the catch by sliding the two lugs toward the ribbon, then pull the ribbon to detach it from the motherboard.
-
Lift up the cover from the laptop.
-
-
-
On the cover that was removed, flip it around and locate where the back of the track pad is.
-
Remove the three screws located at the corners.
-
Lift up the bracket that you just unscrewed and remove track pad.
-




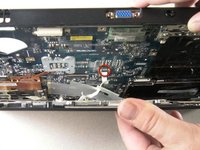

To reassemble your device, follow these instructions in reverse order.
Cancel: I did not complete this guide.
2 other people completed this guide.

Team

Cal Poly, Team 14-39, Forte Fall 2010 Member of Cal Poly, Team 14-39, Forte Fall 2010
CPSU-FORTE-F10S14G39
5 Members
96 Guides authored
3 Guide Comments
You left out about 10 screws & assemblies that have to ALSO be removed to release the cover that surrounds the keyboard and track pad.
You have to remove the video cable, wifi cables and LCD before you try to remove the touchpad/upper cover. You must also remove two screws from the bottom labeled 10x. In other words, you should remove the parts I mentioned before attempting to complete steps 5 to 7.
The Fan must also be removed before removing the touchpad/upper cover.
