
Acer Aspire 5100 LCD Monitor Replacement

Brad Rollinson and 8 other contributors
Last updated on May 11, 2021
Views: 16K
View statistics:
- Past 24 Hours:
- 3
- Past 7 Days:
- 27
- Past 30 Days:
- 116
- All Time:
- 16,399
Comments: 5
4 comments on steps, 1 guide comment.
Go to guide commentsCompleted: 8 9
8 people have marked this guide "completed." Will you be next?
9 people have marked this guide "completed." Including you — great job!
Favorites: 11 12
11 people have favorited (and subscribed to) this guide. Will you be next?
12 people have favorited (and subscribed to) this guide — including you!
Introduction
Go to step 1 ↓If your Acer Aspire screen (model 5100) isn’t producing a clear picture and instead outputs distorted images or intermittent/dead pixels, use this guide to replace the monitor.
The monitor transmits visual data to users through thousands of small pixels. A faulty monitor will transmit distorted or unclear images or no images at all.
Before using this guide, inspect the monitor for any debris that may be interfering with screen quality. Typically, any minute pieces of dust can be removed using an ESD-safe brush or small, damp towel. Be sure to completely shut down your laptop on and off at least two times to confirm that the faulty hardware is the monitor itself.
Before beginning, be sure to turn off your laptop completely and disconnect it from any external power source(s) or monitors if possible.
What you need


-
-
-
Open and push the screen back all the way until it is horizontal with the rest of the laptop.
-
Use an opening tool to remove the panel above the keyboard that has the power button on it.
-
After you have released the tabs, lift up the panel.
 Ask FixBot
-
-
-
Under the panel, remove the two screws that connect the keyboard to the laptop.
-
-
-
Release the catch on the ribbon socket by sliding the two tabs toward the ribbon.
-
Pull the ribbon under the keyboard to detach it from the motherboard.
-
Remove the keyboard.
-
-
-
-
-
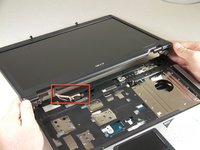
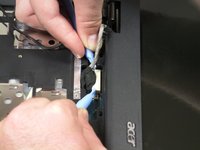
Detach the white rectangle located on the motherboard at the end of the wire connected to the LCD screen.
-
-
-
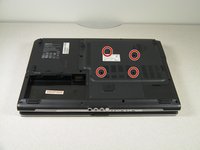
Flip the laptop upside down.
-
Remove the four screws from the back panel of the laptop.
-
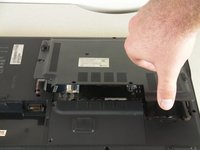
Lift the panel up and set it aside.
-
-






To reassemble your device, follow these instructions in reverse order.
Cancel: I did not complete this guide.
8 other people completed this guide.

Team

Cal Poly, Team 14-39, Forte Fall 2010 Member of Cal Poly, Team 14-39, Forte Fall 2010
CPSU-FORTE-F10S14G39
5 Members
96 Guides authored
