Free Shipping on Domestic Orders $75+

Acer Aspire 4743-6481 Screen Replacement

What you need

    1. Acer Aspire 4743-6481 Screen Replacement, Battery: step 1, image 1 of 1
      • Turn over the laptop to view the underside.

      Ask FixBot

      Add Comment

    2. Acer Aspire 4743-6481 Screen Replacement: step 2, image 1 of 1
      Tool used on this step:
      Tweezers
      $4.99
      Buy
      • Use tweezers (or a similar tool) to slide the orange push pin. To release the battery, push it to the left.

      Ask FixBot

      Add Comment

    3. Acer Aspire 4743-6481 Screen Replacement: step 3, image 1 of 1
      • You can lift the battery up and out now.

      Ask FixBot

      Add Comment

    1. Acer Aspire 4743-6481 Screen Replacement, Screen: step 4, image 1 of 1
      • Position the laptop so you have a clear view of the front of the screen.

      • Remove the two screw covers at the bottom sides of the screen casing using a flat tool.

      • Remove the two 5.0 mm Phillips screws. They will be directly underneath the screw covers.

      Ask FixBot

      Add Comment

    2. Acer Aspire 4743-6481 Screen Replacement: step 5, image 1 of 1
      • Use a flat tool, to pry open along every side of the front casing of the screen.

      • It will require a small amount of force to grudge open. Make sure every side of the casing is loose before removing it.

      • You should use a metal pry tool only if you are unsuccessful with a plastic one. The metal tool could cause damage to your device.

      Ask FixBot

      Add Comment

    3. Acer Aspire 4743-6481 Screen Replacement: step 6, image 1 of 1
      • Remove the front casing.

      • Remove the four 5.0 mm Phillips screws located next to every corner of the screen.

      Ask FixBot

      Add Comment

    4. Acer Aspire 4743-6481 Screen Replacement: step 7, image 1 of 1
      • After removing the screws, gently place the screen on top of the keyboard.

      • Do not attempt to remove the screen yet since it is not fully disconnected from the laptop.

      • You may use a piece of cloth or similar material beneath the new screen to avoid scratching it with the other surface.

      Ask FixBot

      Add Comment

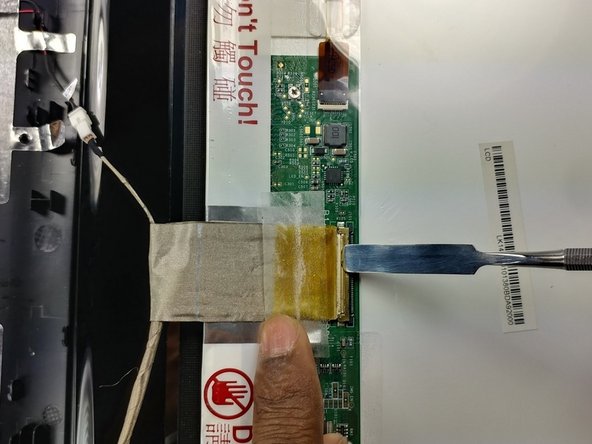
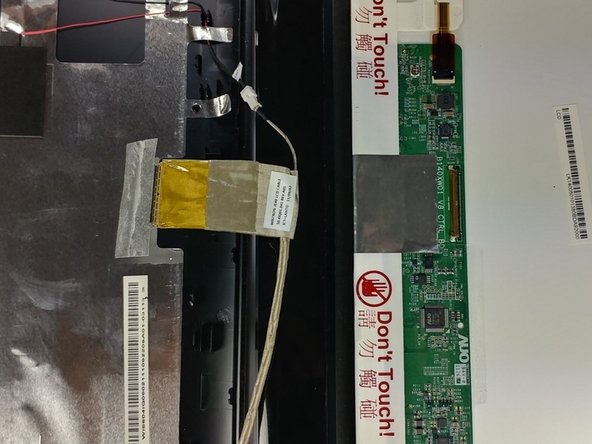
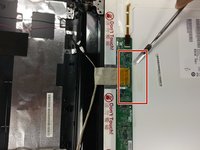
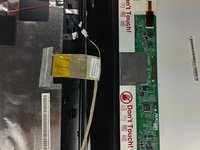
    5. Acer Aspire 4743-6481 Screen Replacement: step 8, image 1 of 3 Acer Aspire 4743-6481 Screen Replacement: step 8, image 2 of 3 Acer Aspire 4743-6481 Screen Replacement: step 8, image 3 of 3
      • Gently remove the tape that covers the connector cable, as highlighted in the first picture.

      • With a flat tool, gently disconnect the connector cable from the damaged screen.

      Ask FixBot

      Add Comment

    6. Acer Aspire 4743-6481 Screen Replacement: step 9, image 1 of 1
      • Remove the four remaining 3.5 mm Phillips screws from the screen piece.

      • There will be two screws on each side, one on the bottom and another on the top.

      Ask FixBot

      Add Comment

    7. Acer Aspire 4743-6481 Screen Replacement: step 10, image 1 of 1
      • The screen can be easily removed from its frame now.

      Ask FixBot

      Add Comment

Conclusion

To reassemble your device, carefully follow these instructions in reverse order.

Cancel: I did not complete this guide.

3 other people completed this guide.

Juan Seijas

Member since: 02/15/17

259 Reputation

1 Guide authored

Team

USF Tampa, Team S5-G1, Lacy Spring 2017 Member of USF Tampa, Team S5-G1, Lacy Spring 2017

USFT-LACY-S17S5G1

4 Members

60 Guides authored

0 Guide Comments

Add Comment

View Statistics:

Past 24 Hours: 1

Past 7 Days: 9

Past 30 Days: 35

All Time: 2,448