
Free Shipping on Domestic Orders $75+

Acer Aspire 3 A315-24PT-R288 Screen Replacement

What you need

  1. Acer Aspire 3 A315-24PT-R288 Screen Replacement, Lower Case: step 1, image 1 of 2 Acer Aspire 3 A315-24PT-R288 Screen Replacement, Lower Case: step 1, image 2 of 2
    • For your safety, unplug all peripheries, discharge the battery below 25%, and power down your device before beginning disassembly.

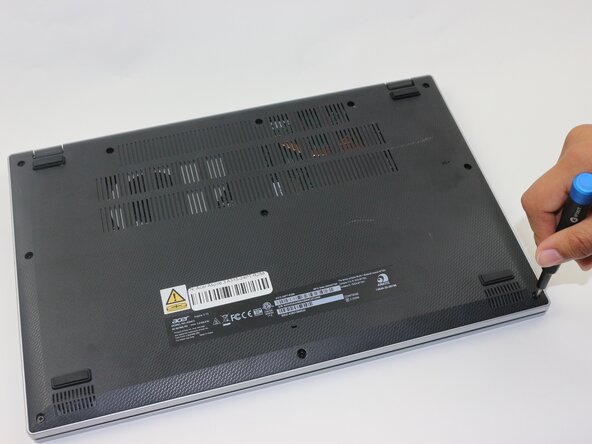
    • Use a Phillips screwdriver to remove the eleven 2 mm screws that secure the lower case.

  2. Acer Aspire 3 A315-24PT-R288 Screen Replacement: step 2, image 1 of 1
    • Insert an opening pick in the seam between the chassis and the lower case.

    • Slide the opening pick around the entire perimeter, prying every couple of centimeters, to release all of the retaining clips that secure the lower case.

    • Remove the lower case.

  3. Acer Aspire 3 A315-24PT-R288 Screen Replacement, Acer Aspire 3 A315-24PT-R288 Battery Disconnection: step 3, image 1 of 1
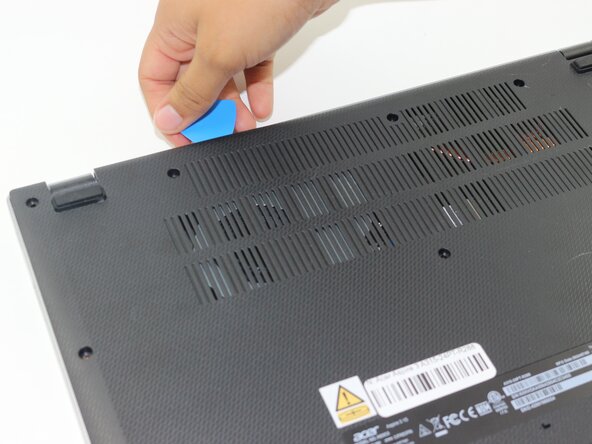
    • Remove the tape on the battery connector using tweezers or your fingers.

  4. Acer Aspire 3 A315-24PT-R288 Screen Replacement: step 4, image 1 of 2 Acer Aspire 3 A315-24PT-R288 Screen Replacement: step 4, image 2 of 2
    • Use an opening pick or the flat end of a spudger to gently push the battery connector out of its motherboard socket.

  5. Acer Aspire 3 A315-24PT-R288 Screen Replacement, Screen: step 5, image 1 of 1
    • Flip the laptop over and open the lid.

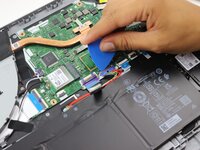
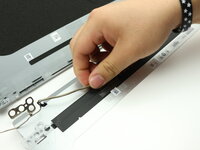
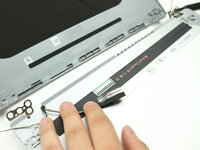
    • Insert an opening pick in the seam between the bezel and screen.

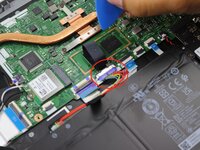
    • Pry around the entire perimeter of the bezel to release the clips.

    • Remove the bezel.

  6. Acer Aspire 3 A315-24PT-R288 Screen Replacement: step 6, image 1 of 1
    • Remove both of the 2 mm screws at the top-left and top-right corners of the screen.

  7. Acer Aspire 3 A315-24PT-R288 Screen Replacement: step 7, image 1 of 1
    • Remove the eight 3 mm screws that secure the hinge to the display assembly.

    • There are four screws on each hinge.

  8. Acer Aspire 3 A315-24PT-R288 Screen Replacement: step 8, image 1 of 1
    • Disconnect the small press connector on the top-left side of the screen.

  9. Acer Aspire 3 A315-24PT-R288 Screen Replacement: step 9, image 1 of 1
    • Dislodge the cords from their retaining hooks.

  10. Acer Aspire 3 A315-24PT-R288 Screen Replacement: step 10, image 1 of 1
    • Gently lift the screen away from the display assembly, with care not to strain the connected cables.

  11. Acer Aspire 3 A315-24PT-R288 Screen Replacement: step 11, image 1 of 2 Acer Aspire 3 A315-24PT-R288 Screen Replacement: step 11, image 2 of 2
    • Lay down the screen flat with the back facing you.

    • Flip up the display connector locking bar.

    • Pull the display connector directly out of its socket.

    • Remove the screen.

Conclusion

To reassemble your device, follow the above steps in reverse order.
Take your e-waste to an R2 or e-Stewards certified recycler.
Repair didn’t go as planned? Try some basic troubleshooting or ask our Answers community for help.

2 other people completed this guide.

Zachariah Fernandez

Member since: 02/19/25

337 Reputation

1 Guide authored

0 Guide Comments

Add Comment

View Statistics:

Past 24 Hours: 3

Past 7 Days: 20

Past 30 Days: 64

All Time: 635