Free Shipping on Domestic Orders $75+

Acer AL1916 EMI Shield Replacement

What you need

    1. Acer AL1916 EMI Shield Replacement, Stand: step 1, image 1 of 1
      • Lay the monitor on a flat surface so that the back is facing up.

      Ask FixBot
      Add Comment

    2. Acer AL1916 EMI Shield Replacement: step 2, image 1 of 2 Acer AL1916 EMI Shield Replacement: step 2, image 2 of 2
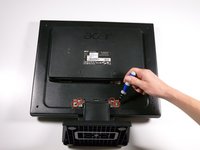
      • Grab the hinge cover with both hands on either side of the stand.

      • Squeeze inwards with your thumbs and fingers and lift up to remove the hinge cover.

      Ask FixBot
      Add Comment

    3. Acer AL1916 EMI Shield Replacement: step 3, image 1 of 2 Acer AL1916 EMI Shield Replacement: step 3, image 2 of 2
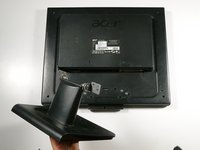
      • Remove the four 12.1 mm Phillips #2 screws that hold the stand to the monitor.

      • Support the monitor while removing the screws to prevent the monitor from falling.

      • Lift up to detach the stand.

      Ask FixBot

      Add Comment

    1. Acer AL1916 EMI Shield Replacement, Outer Case: step 4, image 1 of 2 Acer AL1916 EMI Shield Replacement, Outer Case: step 4, image 2 of 2
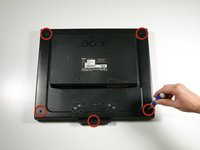
      • Remove the five 9.5 mm Phillips #2 screws located around the perimeter of the monitor.

      Ask FixBot

      Add Comment

    2. Acer AL1916 EMI Shield Replacement: step 5, image 1 of 3 Acer AL1916 EMI Shield Replacement: step 5, image 2 of 3 Acer AL1916 EMI Shield Replacement: step 5, image 3 of 3
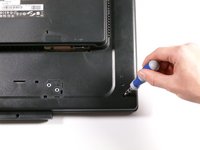
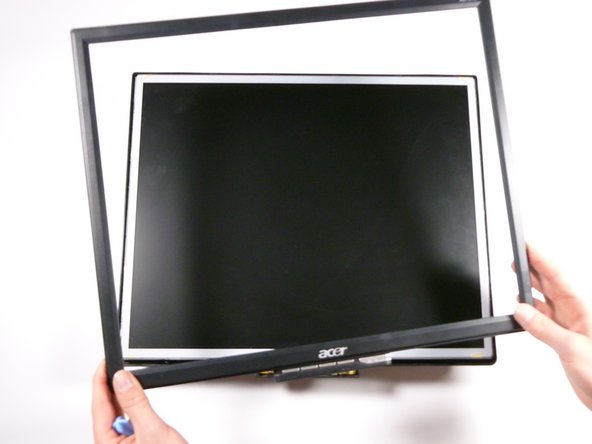
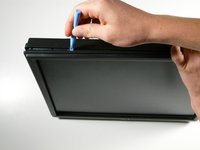
      • Starting at the corner of the monitor, wedge the small plastic opening tool between the back cover and the display bezel.

      • Tilt the plastic opening tool up to separate the back cover from the display bezel.

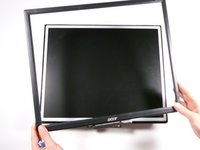
      • Continue around the perimeter of the monitor until the display bezel comes off.

      • A reasonable amount of force is necessary to detach the back cover from the display bezel.

      Ask FixBot

      Add Comment

    3. Acer AL1916 EMI Shield Replacement: step 6, image 1 of 2 Acer AL1916 EMI Shield Replacement: step 6, image 2 of 2
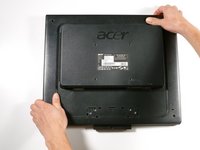
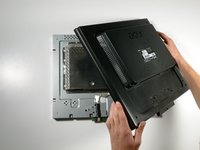
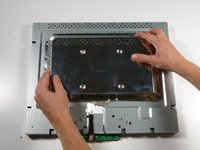
      • Reposition the monitor so that the back is facing up.

      • Grab the corners of the monitor and jiggle them upwards to detach the back cover from the inside of the monitor.

      • Lift the back cover up.

      Ask FixBot
      Add Comment

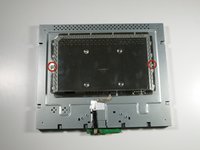
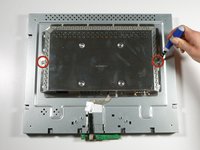
    1. Acer AL1916 EMI Shield Replacement, EMI Shield: step 7, image 1 of 2 Acer AL1916 EMI Shield Replacement, EMI Shield: step 7, image 2 of 2
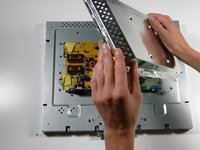
      • Remove the two 5.7 mm Phillips #2 screws located on either side of the EMI shield.

      Ask FixBot
      Add Comment

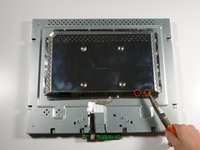
    2. Acer AL1916 EMI Shield Replacement: step 8, image 1 of 2 Acer AL1916 EMI Shield Replacement: step 8, image 2 of 2
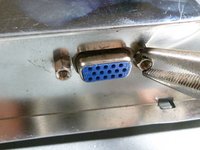
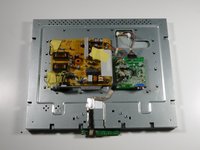
      • Using a nut driver (or if necessary, needle-nose pliers), remove the two nuts on either side of the VGA input.

      Ask FixBot
      Add Comment

    3. Acer AL1916 EMI Shield Replacement: step 9, image 1 of 3 Acer AL1916 EMI Shield Replacement: step 9, image 2 of 3 Acer AL1916 EMI Shield Replacement: step 9, image 3 of 3
      • Grab the metal casing by the sides and slide it down towards the bottom of the monitor.

      • Lift up to remove the metal casing.

      • Beware, metal casing is sharp!

      Ask FixBot

      Add Comment

Conclusion

To reassemble your device, follow these instructions in reverse order.

Cancel: I did not complete this guide.

Taylor Atterbury

Member since: 10/06/11

747 Reputation

3 Guides authored

Team

Cal Poly, Team 20-26, Maness Fall 2011 Member of Cal Poly, Team 20-26, Maness Fall 2011

CPSU-MANESS-F11S20G26

4 Members

84 Guides authored

0 Guide Comments

Add Comment

View Statistics:

Past 24 Hours: 1

Past 7 Days: 4

Past 30 Days: 32

All Time: 1,730