
AT-LP60X Belt Installation

Anthony @ ATUS and one other contributor
Last updated on Mar 17, 2025
Views: 7.6K
View statistics:
- Past 24 Hours:
- 32
- Past 7 Days:
- 229
- Past 30 Days:
- 745
- All Time:
- 7,573
Comments: 0
No one has left comments on this guide. Will you be first?
Go to guide commentsCompleted: 2 3
2 people have marked this guide "completed." Will you be next?
3 people have marked this guide "completed." Including you — great job!
Favorites: 0 1
No one has favorited (and subscribed to) this guide. Will you be the first?
1 person has favorited (and subscribed to) this guide — and that's you!
Community-Contributed Guide
An awesome member of our community made this guide. It was not created by iFixit staff.
Introduction
Go to step 1 ↓This guide is used to properly install the belt on the AT-LP60X (or similar models). Proper installation of the belt can resolve lack of spinning conditions.
What you need
Parts
-
Twist tieOptional
-

-
-
-
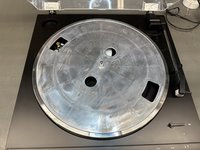
Remove the slipmat from the platter.
-
Pull the platter off by lifting vertically from the two circular holes.
-
-
-
Locate the belt.
-
Flip the platter upside-down and place the belt around the inner ring of the platter.
-
-
-
Place the platter back on the center spindle.
-
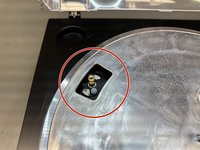
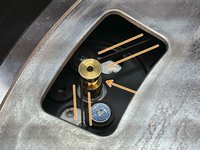
Spin the platter such that the gold pulley of the motor is showing.
-
Stretch the belt from the platter around the gold pulley of the motor.
-
-
-
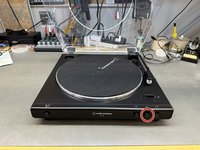
Place the slipmat back onto the platter, and press the STOP button.
-
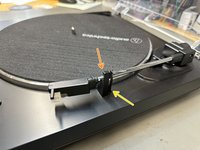
Using your right hand, secure the tone arm in place.
-
[OPTIONAL] Use a twist tie and the built in hook.
-
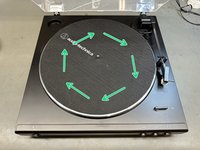
While the tone arm is secured, use your left hand to slowly spin the platter 10 times clockwise.
-
-
-
-
Any twists while installing the belt will cause improper operation.
-
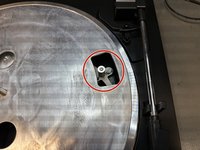
The belt should NOT be connected to this white post.
-
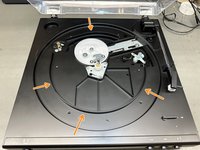
The belt should NOT be connected to the base of the turntable.
-


 Ask FixBot






If this guide does not fix the issue of the platter not spinning, the following issues could be present:
- Faulty AC Adaptor - Can be purchased here.
- Faulty Diode (D01) - Requires soldering (repair guide can be provided upon request: service@atus.com). Part Number: 576-SMAJ13A
- Faulty Motor - Requires soldering (repair guide can be provided upon request: service@atus.com). Part Number: 704-F706-7303
To send your turntable in for service, please follow the necessary steps from our website.
Feel free to contact one of our technicians for further assistance at (330)686-2600 ext.5004
Cancel: I did not complete this guide.
2 other people completed this guide.

