Free Shipping on Domestic Orders $75+

ASUS X552LAV-BBI5N08 Screen Replacement

What you need

    1. ASUS X552LAV-BBI5N08 Screen Replacement, Battery: step 1, image 1 of 1
      • Battery is not showed in pictures.

      • Flip the laptop face down.

      Ask FixBot
      Add Comment

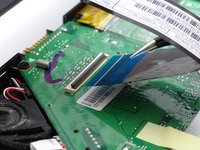
    2. ASUS X552LAV-BBI5N08 Screen Replacement: step 2, image 1 of 3 ASUS X552LAV-BBI5N08 Screen Replacement: step 2, image 2 of 3 ASUS X552LAV-BBI5N08 Screen Replacement: step 2, image 3 of 3
      • Slide the right button to the left.

      • Hold the left button to the right.

      • While you hold the left button in position, slide the battery out by pushing it away from you.

      Ask FixBot
      Add Comment

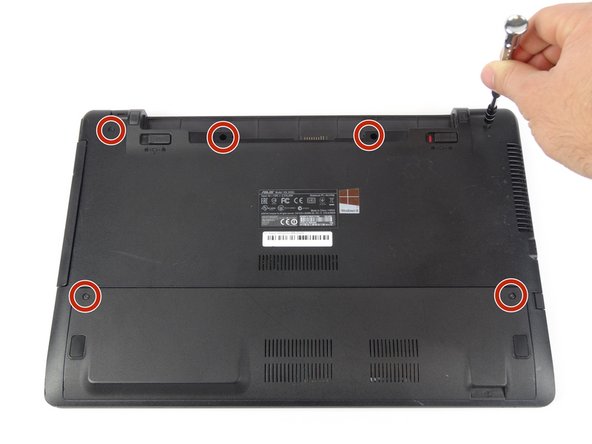
    1. ASUS X552LAV-BBI5N08 Screen Replacement, Screen: step 3, image 1 of 3 ASUS X552LAV-BBI5N08 Screen Replacement, Screen: step 3, image 2 of 3 ASUS X552LAV-BBI5N08 Screen Replacement, Screen: step 3, image 3 of 3
      • Remove the six 12mm screws located at both the battery area and the bottom panel, with a Tri-wing Y1 screwdriver.

      • Slide the bottom panel down and lift it up to remove.

      • Remove the seven 5.5mm screws located at the bottom area with a Tri-wing Y1 screwdriver.

      Ask FixBot

      Add Comment

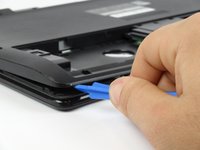
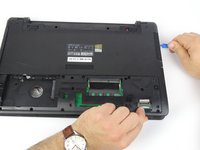
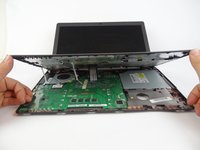
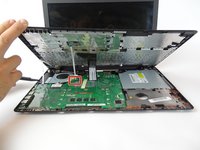
    2. ASUS X552LAV-BBI5N08 Screen Replacement: step 4, image 1 of 3 ASUS X552LAV-BBI5N08 Screen Replacement: step 4, image 2 of 3 ASUS X552LAV-BBI5N08 Screen Replacement: step 4, image 3 of 3
      • Use an opening tool to split keyboard from base of the laptop.

      • Make sure to start from one end and go around the edges.

      • Flip laptop to sit on its bottom.

      • Lift keyboard up by the front edge.

      Ask FixBot

      Add Comment

    3. ASUS X552LAV-BBI5N08 Screen Replacement: step 5, image 1 of 3 ASUS X552LAV-BBI5N08 Screen Replacement: step 5, image 2 of 3 ASUS X552LAV-BBI5N08 Screen Replacement: step 5, image 3 of 3
      • Flip up the small locking flap for the two ZIF connectors.

      • Unplug the connectors that are keeping the keyboard connected.

      Ask FixBot

      Add Comment

    4. ASUS X552LAV-BBI5N08 Screen Replacement: step 6, image 1 of 3 ASUS X552LAV-BBI5N08 Screen Replacement: step 6, image 2 of 3 ASUS X552LAV-BBI5N08 Screen Replacement: step 6, image 3 of 3
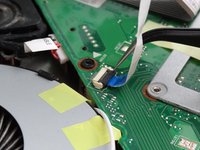
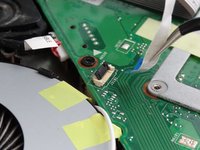
      • Flip up the locking flap for the ZIF connector.

      • Unplug the connector.

      Ask FixBot

      Add Comment

    5. ASUS X552LAV-BBI5N08 Screen Replacement: step 7, image 1 of 3 ASUS X552LAV-BBI5N08 Screen Replacement: step 7, image 2 of 3 ASUS X552LAV-BBI5N08 Screen Replacement: step 7, image 3 of 3
      Tool used on this step:
      Tweezers
      $4.99
      Buy
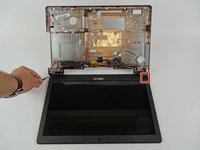
      • Flip laptop to sit with the screen on the bottom.

      • Use tweezers to remove the square decorative sticker from the top of screws from the edge of the screen frame.

      • Remove six 4mm screws (with a JIS #1 screwdriver) from under the stickers and both of the hinges.

      Ask FixBot
      Add Comment

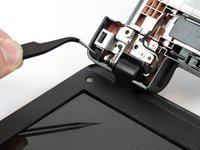
    6. ASUS X552LAV-BBI5N08 Screen Replacement: step 8, image 1 of 2 ASUS X552LAV-BBI5N08 Screen Replacement: step 8, image 2 of 2
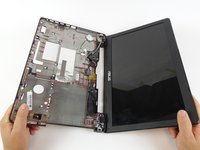
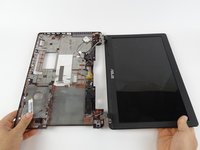
      • Release hinges with the motion of opening a book.

      Ask FixBot
      Add Comment

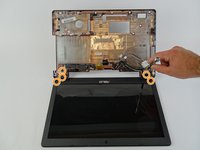
    7. ASUS X552LAV-BBI5N08 Screen Replacement: step 9, image 1 of 3 ASUS X552LAV-BBI5N08 Screen Replacement: step 9, image 2 of 3 ASUS X552LAV-BBI5N08 Screen Replacement: step 9, image 3 of 3
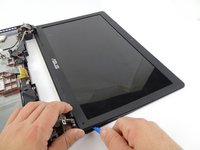
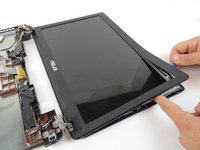
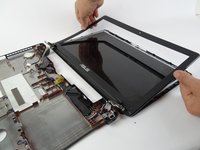
      • Use an opening tool to pry apart the frame from the edge of the screen

      • Go around the edges til the frame pops off from the screen

      Ask FixBot
      Add Comment

    8. ASUS X552LAV-BBI5N08 Screen Replacement: step 10, image 1 of 3 ASUS X552LAV-BBI5N08 Screen Replacement: step 10, image 2 of 3 ASUS X552LAV-BBI5N08 Screen Replacement: step 10, image 3 of 3
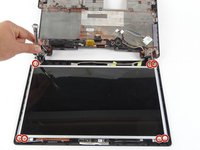
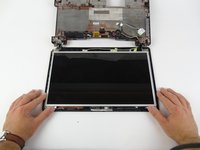
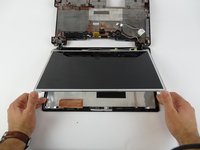
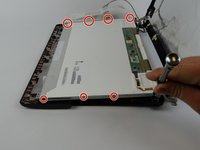
      • Remove eight 4mm screws from the corners of the screen using a JIS #000 screwdriver.

      • Flip the screen towards the bottom panel face down.

      Ask FixBot

      Add Comment

    9. ASUS X552LAV-BBI5N08 Screen Replacement: step 11, image 1 of 3 ASUS X552LAV-BBI5N08 Screen Replacement: step 11, image 2 of 3 ASUS X552LAV-BBI5N08 Screen Replacement: step 11, image 3 of 3
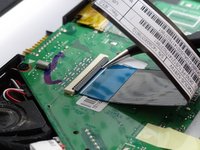
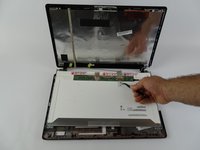
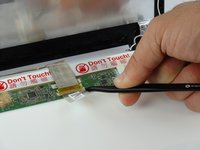
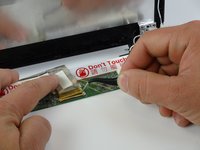
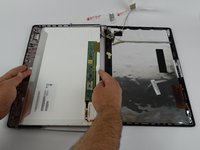
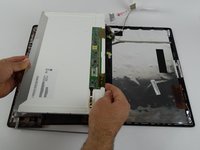
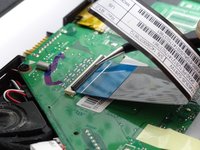
      • Use tweezers to remove the tape from the top of yellow lock.

      • Open the yellow ZIF connector.

      Ask FixBot

      Add Comment

    10. ASUS X552LAV-BBI5N08 Screen Replacement: step 12, image 1 of 2 ASUS X552LAV-BBI5N08 Screen Replacement: step 12, image 2 of 2
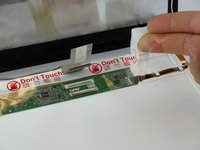
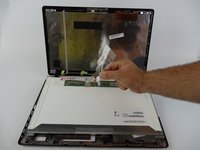
      • Remove the tape completely from the back panel.

      Ask FixBot

      Add Comment

    11. ASUS X552LAV-BBI5N08 Screen Replacement: step 13, image 1 of 3 ASUS X552LAV-BBI5N08 Screen Replacement: step 13, image 2 of 3 ASUS X552LAV-BBI5N08 Screen Replacement: step 13, image 3 of 3
      • Remove the casing from the edges of the screen by removing the eight 2mm screws with a JIS #000 screwdriver.

      • Pull the screen up to remove it.

      Ask FixBot

      Add Comment

Conclusion

To reassemble your device, follow these instructions in reverse order.

Cancel: I did not complete this guide.

Jason Vo

Member since: 02/15/18

891 Reputation

5 Guides authored

Team

USF Tampa, Team S17-G1, Boczar Spring 2018 Member of USF Tampa, Team S17-G1, Boczar Spring 2018

USFT-BOCZAR-S18S17G1

4 Members

60 Guides authored

0 Guide Comments

Add Comment

View Statistics:

Past 24 Hours: 2

Past 7 Days: 8

Past 30 Days: 26

All Time: 708