Free Shipping on Domestic Orders $75+

ASUS X552LAV-BBI5N08 Hard Drive Replacement

What you need

    1. ASUS X552LAV-BBI5N08 Hard Drive Replacement, Battery: step 1, image 1 of 1
      • Battery is not showed in pictures.

      • Flip the laptop face down.

      Ask FixBot
      Add Comment

    2. ASUS X552LAV-BBI5N08 Hard Drive Replacement: step 2, image 1 of 3 ASUS X552LAV-BBI5N08 Hard Drive Replacement: step 2, image 2 of 3 ASUS X552LAV-BBI5N08 Hard Drive Replacement: step 2, image 3 of 3
      • Slide the right button to the left.

      • Hold the left button to the right.

      • While you hold the left button in position, slide the battery out by pushing it away from you.

      Ask FixBot

      Add Comment

    1. ASUS X552LAV-BBI5N08 Hard Drive Replacement, Hard Drive: step 3, image 1 of 1
      • Start by flipping the laptop face down.

      • Locate the bottom panel. It is at the opposite end of the battery.

      • Remove the two 12mm screws at the bottom panel with a Tri-wing Y1 screwdriver.

      Ask FixBot

      Add Comment

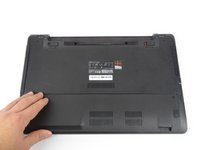
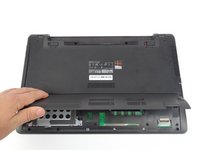
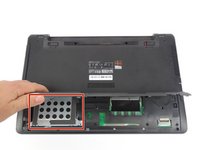
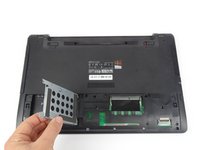
    2. ASUS X552LAV-BBI5N08 Hard Drive Replacement: step 4, image 1 of 3 ASUS X552LAV-BBI5N08 Hard Drive Replacement: step 4, image 2 of 3 ASUS X552LAV-BBI5N08 Hard Drive Replacement: step 4, image 3 of 3
      • Remove bottom panel by lifting it up.

      • Locate the hard drive.

      • It is located in the bottom left corner.

      Ask FixBot

      Add Comment

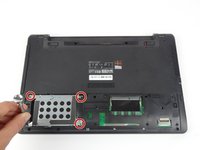
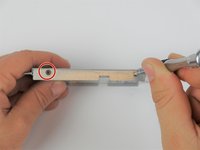
    3. ASUS X552LAV-BBI5N08 Hard Drive Replacement: step 5, image 1 of 3 ASUS X552LAV-BBI5N08 Hard Drive Replacement: step 5, image 2 of 3 ASUS X552LAV-BBI5N08 Hard Drive Replacement: step 5, image 3 of 3
      • Remove the four 5.5mm screws located on the hard drive case using a Tri-wing Y1 screwdriver.

      • Slide the hard drive out to the left.

      Ask FixBot

      Add Comment

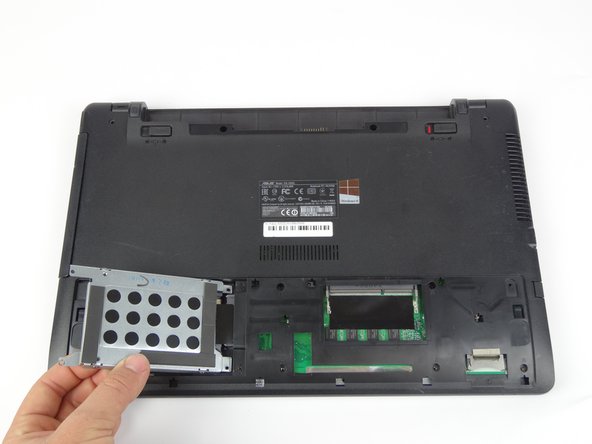
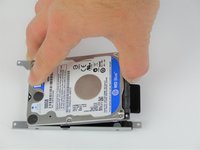
    4. ASUS X552LAV-BBI5N08 Hard Drive Replacement: step 6, image 1 of 2 ASUS X552LAV-BBI5N08 Hard Drive Replacement: step 6, image 2 of 2
      • Lift the hard drive out.

      • Once the hard drive is removed, place the hard drive at a different area.

      Ask FixBot

      Add Comment

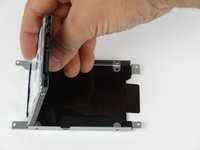
    5. ASUS X552LAV-BBI5N08 Hard Drive Replacement: step 7, image 1 of 3 ASUS X552LAV-BBI5N08 Hard Drive Replacement: step 7, image 2 of 3 ASUS X552LAV-BBI5N08 Hard Drive Replacement: step 7, image 3 of 3
      • Place the hard drive on its side.

      • Remove the four 5mm screws from the sides of the case by using a Tri-wing Y1 screwdriver.

      • Lift the hard drive out of the case.

      Ask FixBot

      Add Comment

Conclusion

To reassemble your device, follow these instructions in reverse order.

Cancel: I did not complete this guide.

Jason Vo

Member since: 02/15/18

891 Reputation

5 Guides authored

Team

USF Tampa, Team S17-G1, Boczar Spring 2018 Member of USF Tampa, Team S17-G1, Boczar Spring 2018

USFT-BOCZAR-S18S17G1

4 Members

60 Guides authored

0 Guide Comments

Add Comment

View Statistics:

Past 24 Hours: 1

Past 7 Days: 12

Past 30 Days: 30

All Time: 694