
ASUS X533SA-BHCLN10 Optical Disc Drive Replacement

Edmund Lee and 4 other contributors
Last updated on Dec 15, 2017
Views: 651
View statistics:
- Past 24 Hours:
- 2
- Past 7 Days:
- 18
- Past 30 Days:
- 77
- All Time:
- 651
Comments: 0
No one has left comments on this guide. Will you be first?
Go to guide commentsCompleted: 0 1
No one has marked this guide "completed." Will you be the first?
1 person has marked this guide "completed." It's you — great job!
Favorites: 0 1
No one has favorited (and subscribed to) this guide. Will you be the first?
1 person has favorited (and subscribed to) this guide — and that's you!
Missing Details
Some of this guide's details are missing. Help users by adding tools, difficulty, or time.
Introduction
Go to step 1 ↓In this guide we will be replacing your optical drive or CD-drive. If you are noticing that disks are not responding to your optical drive it is possible it is failing and you need to replace it with a new one. Optical drives are usually not too expensive and are easy to replace. With this guide you be able to efficiently and safely go through the process and be back to having a working replaced optical drive.
What you need
Tools


-
-
-
Turn over the laptop on the back panel.
-
Use the Phillips #0 screwdriver to unscrew all ten screws visible on the back panel. There should be a total of ten screws: (4) four 5.5mm screws and (6) six 10.5mm screws.
 Ask FixBot
-
-
-
Turn over the laptop with the keyboard facing upwards.
-
Using a small prying or opening tool, stick the prying tool under the edge of the laptop.
-
-
-
-
After the laptop is completely pried open carefully remove the keyboard from the laptop.
-
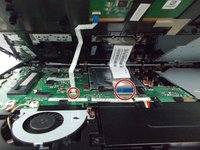
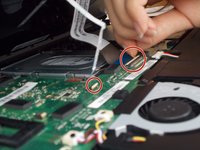
There are two small keyboard cables connecting the keyboard to the laptop. Carefully remove these by popping up the white clips holding them in place and slide the connector out.
-
-
-
-
-
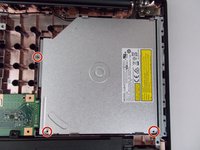
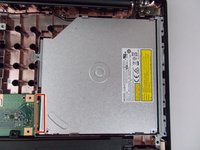
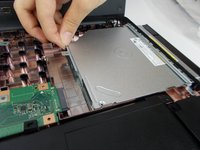
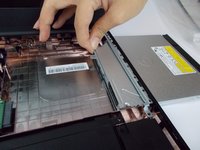
Gently, push the optical drive part from inside to remove the drive from the motherboard socket.
-




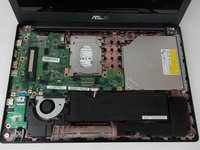


To reassemble your device, follow these instructions in reverse order.

Team

USF Tampa, Team S13-G3, Boczar Fall 2017 Member of USF Tampa, Team S13-G3, Boczar Fall 2017
USFT-BOCZAR-F17S13G3
5 Members
60 Guides authored
