Free Shipping on Domestic Orders $75+

ASUS X502CA Left I/O Board Replacement

What you need

    1. ASUS X502CA Left I/O Board Replacement, Palm Rest with Keyboard and Touch Pad: step 1, image 1 of 1
      • Use the Phillips #00 screwdriver to remove the seven 90mm screws.

      • Use the Phillips #00 screwdriver to remove the four 50mm screws.

      Ask FixBot

      Add Comment

    2. ASUS X502CA Left I/O Board Replacement: step 2, image 1 of 1
      • Next, use the plastic opening tool to carefully pop off the keyboard cover panel.

      • Be cautious when pulling off the cover because there are cables you will have to disconnect before completely removing the panel.

      Ask FixBot

      Add Comment

    3. ASUS X502CA Left I/O Board Replacement: step 3, image 1 of 2 ASUS X502CA Left I/O Board Replacement: step 3, image 2 of 2
      Tool used on this step:
      Tweezers
      $4.99
      Buy
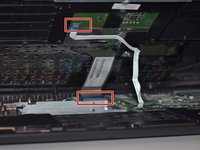
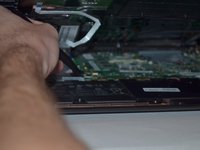
      • Lift palm rest and unplug keyboard cable and touchpad cable using tweezers. After these two cables have been unplugged you can remove the keyboard cover panel.

      Ask FixBot

      Add Comment

    4. ASUS X502CA Left I/O Board Replacement: step 4, image 1 of 2 ASUS X502CA Left I/O Board Replacement: step 4, image 2 of 2
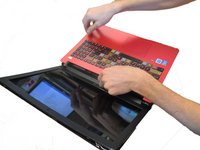
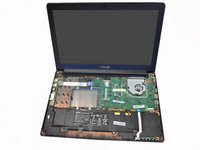
      • Lift Palm Rest away.

      • Replace with new palm rest.

      Ask FixBot

      Add Comment

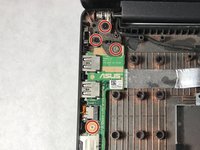
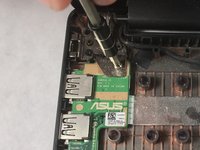
    1. ASUS X502CA Left I/O Board Replacement, Left I/O Board: step 5, image 1 of 2 ASUS X502CA Left I/O Board Replacement, Left I/O Board: step 5, image 2 of 2
      • Locate the I/O board on the left of the computer. Using the Phillips #0 screwdriver, unscrew the three 5mm screws to unhinge the screen, which will free the board allowing it to be removed and replaced.

      • Be careful with handling your computer while one side is unhinged; mishandling or over pressuring the other hinge could cause damage to it or the screen.

      Ask FixBot

      Add Comment

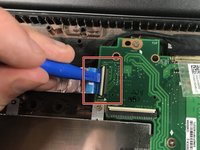
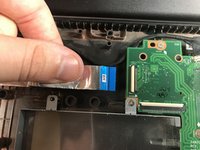
    2. ASUS X502CA Left I/O Board Replacement: step 6, image 1 of 2 ASUS X502CA Left I/O Board Replacement: step 6, image 2 of 2
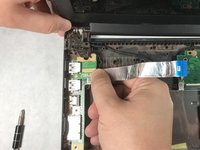
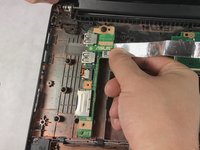
      • Unplug the power strip connecting to the motherboard with your fingers or plastic opening tool.

      • Make sure the power strip is disconnected before pulling the board out.

      Ask FixBot

      Add Comment

    3. ASUS X502CA Left I/O Board Replacement: step 7, image 1 of 2 ASUS X502CA Left I/O Board Replacement: step 7, image 2 of 2
      • Slightly pull the unhinged screen up to free the board and remove it.

      Ask FixBot

      Add Comment

Conclusion

To reassemble your device, follow these instructions in reverse order.

Cancel: I did not complete this guide.

Christian Spencer

Member since: 11/06/18

436 Reputation

4 Guides authored

Team

0 Guide Comments

Add Comment

View Statistics:

Past 24 Hours: 2

Past 7 Days: 5

Past 30 Days: 60

All Time: 504