Free Shipping on Domestic Orders $75+

ASUS X42J Laptop Fan Replacement

What you need

    1. ASUS X42J Laptop Fan Replacement, Keyboard: step 1, image 1 of 1
      Tool used on this step:
      Metal Spudger
      $2.99
      Buy
      • Make sure your device is unplugged and turned off before proceeding.

      • Using a Spudger, gently pry up the keyboard.

      Ask FixBot

      Add Comment

    2. ASUS X42J Laptop Fan Replacement: step 2, image 1 of 2 ASUS X42J Laptop Fan Replacement: step 2, image 2 of 2
      Tool used on this step:
      Nylon Tipped Tweezers
      $4.99
      Buy
      • Rotate the keyboard to face downward.

      • Pull out the blue wiring connection. Use tweezers to make it easier to remove.

      Ask FixBot

      Add Comment

    1. ASUS X42J Laptop Fan Replacement, Disk Drive: step 3, image 1 of 1
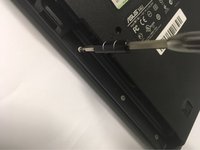
      • Use the Phillips #0 screwdriver to remove the two screws on the back of the laptop.

      Ask FixBot

      Add Comment

    2. ASUS X42J Laptop Fan Replacement: step 4, image 1 of 1
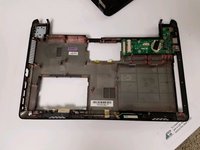
      • Slide the disk drive out of the device.

      Ask FixBot
      Add Comment

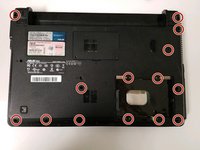
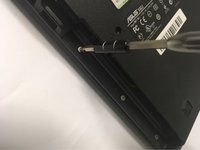
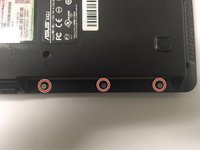
    1. ASUS X42J Laptop Fan Replacement, Motherboard: step 5, image 1 of 3 ASUS X42J Laptop Fan Replacement, Motherboard: step 5, image 2 of 3 ASUS X42J Laptop Fan Replacement, Motherboard: step 5, image 3 of 3
      • Remove all screws located on the bottom plate of the laptop, beginning with the three located underneath the disc drive.

      Ask FixBot
      Add Comment

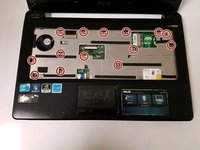
    2. ASUS X42J Laptop Fan Replacement: step 6, image 1 of 2 ASUS X42J Laptop Fan Replacement: step 6, image 2 of 2
      • Rotate the laptop until it is sitting face up and extract all screws exposed by removing the keyboard.

      Ask FixBot

      Add Comment

    3. ASUS X42J Laptop Fan Replacement: step 7, image 1 of 2 ASUS X42J Laptop Fan Replacement: step 7, image 2 of 2
      Tool used on this step:
      Metal Spudger
      $2.99
      Buy
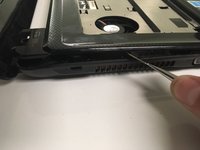
      • Pull up on the front panel using the spudger until the front panel separates from the bottom panel.

      Ask FixBot

      Add Comment

    4. ASUS X42J Laptop Fan Replacement: step 8, image 1 of 1
      • Unscrew and remove the marked screws.

      Ask FixBot

      Add Comment

    5. ASUS X42J Laptop Fan Replacement: step 9, image 1 of 1
      • Separate the connectors.

      Ask FixBot

      Add Comment

    6. ASUS X42J Laptop Fan Replacement: step 10, image 1 of 2 ASUS X42J Laptop Fan Replacement: step 10, image 2 of 2
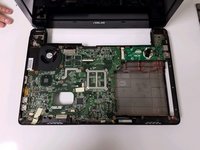
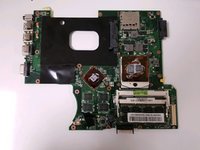
      • Remove the motherboard from the device.

      Ask FixBot

      Add Comment

    1. ASUS X42J Laptop Fan Replacement, Fan: step 11, image 1 of 1
      • Unscrew the six screws using the Phillips #0 Screwdriver.

      Ask FixBot

      Add Comment

    2. ASUS X42J Laptop Fan Replacement: step 12, image 1 of 1
      • Unplug the fan's wires from the motherboard.

      Ask FixBot

      Add Comment

    3. ASUS X42J Laptop Fan Replacement: step 13, image 1 of 2 ASUS X42J Laptop Fan Replacement: step 13, image 2 of 2
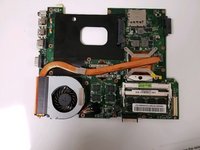
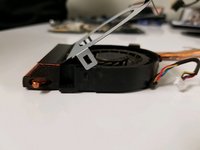
      • Remove the fan from the motherboard.

      Ask FixBot

      Add Comment

Conclusion

To reassemble your device, follow these instructions in reverse order.

Cancel: I did not complete this guide.

Ryan Pritchard

Member since: 09/21/18

105 Reputation

1 Guide authored

1 Guide Comment

First step is wrong; attempting to prise out the keyboard will damage it. First step should be to remove the screws which hold in the keyboard.

Kate Gregory - Reply Share

Add Comment

View Statistics:

Past 24 Hours: 1

Past 7 Days: 9

Past 30 Days: 38

All Time: 950