
Free Shipping on Domestic Orders $75+

ASUS U52F-BBG6 Wi-Fi Chip Replacement

What you need

  1. ASUS U52F-BBG6 Wi-Fi Chip Replacement, Back Cover: step 1, image 1 of 2 ASUS U52F-BBG6 Wi-Fi Chip Replacement, Back Cover: step 1, image 2 of 2
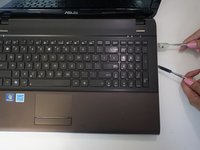
    • Flip the laptop over to the back.

    • Slide the right latch to unlock, then simultaneously slide the left latch outward while pulling the battery out.

    Ask FixBot

    Add Comment

  2. ASUS U52F-BBG6 Wi-Fi Chip Replacement: step 2, image 1 of 3 ASUS U52F-BBG6 Wi-Fi Chip Replacement: step 2, image 2 of 3 ASUS U52F-BBG6 Wi-Fi Chip Replacement: step 2, image 3 of 3
    • Unscrew all twelve 3mm Phillips screws with the J1 screwdriver.

    • Unscrew two 3mm Phillips screws on the black panel using the PH0 screwdriver.

    • Lift the black panel upward by inserting your fingernail in the space provided.

    Ask FixBot

    Add Comment

  3. ASUS U52F-BBG6 Wi-Fi Chip Replacement: step 3, image 1 of 3 ASUS U52F-BBG6 Wi-Fi Chip Replacement: step 3, image 2 of 3 ASUS U52F-BBG6 Wi-Fi Chip Replacement: step 3, image 3 of 3
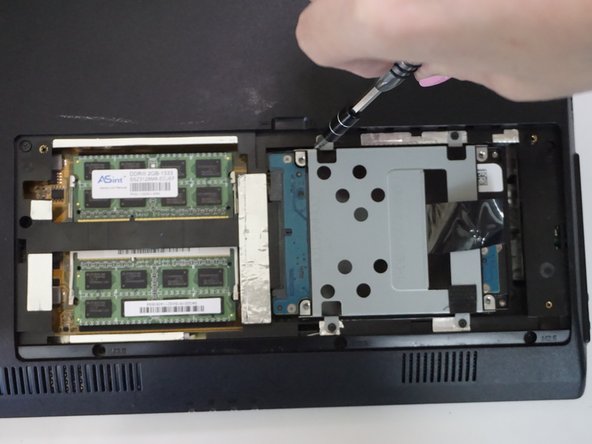
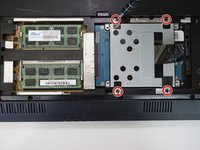
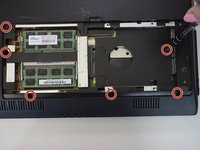
    • In the RAM and hard drive compartment, unscrew the four 3mm Phillips screws using the J1 screwdriver.

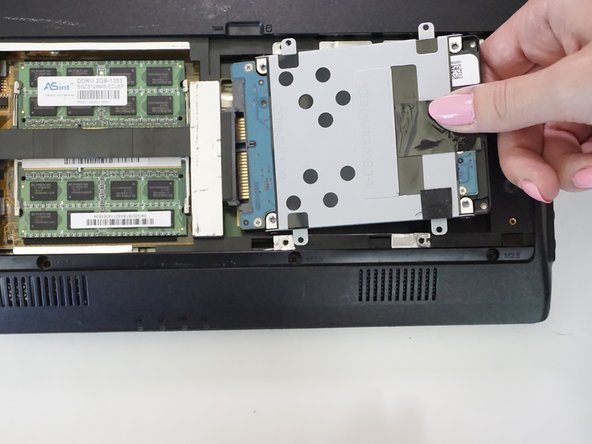
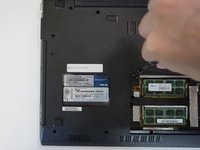
    • Gently pull out the hard drive.

    Ask FixBot

    Add Comment

  4. ASUS U52F-BBG6 Wi-Fi Chip Replacement: step 4, image 1 of 2 ASUS U52F-BBG6 Wi-Fi Chip Replacement: step 4, image 2 of 2
    • Unscrew six 3mm Phillips screws in the RAM and hard drive compartment with the J1 screwdriver.

    Ask FixBot

    Add Comment

  5. ASUS U52F-BBG6 Wi-Fi Chip Replacement: step 5, image 1 of 1
    • Pull the CD drive outward with your left hand.

    Ask FixBot

    Add Comment

  6. ASUS U52F-BBG6 Wi-Fi Chip Replacement: step 6, image 1 of 2 ASUS U52F-BBG6 Wi-Fi Chip Replacement: step 6, image 2 of 2
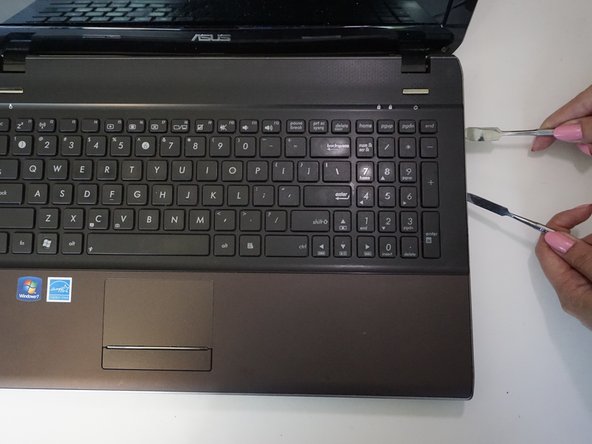
    • Insert and gently twist the flat metal spudger between the keyboard assembly and the bottom plastic cover so that a small seam is opened.

    • Put in the metal spudger in the seam to hold its place while twisting and levering the flat metal spudger along the whole keyboard.

    • Be careful not to hit any of the internals with the metal spudger. The regular black nylon spudger should be used whenever possible, especially around batteries or sensitive internal components.

    • You will need add a lot of pressure to open the laptop. Expect to hear snaps as the clips holding the two pieces are released.

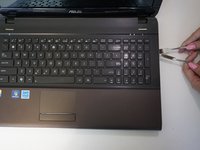
    • Slowly pry off the back

    Ask FixBot

    Add Comment

  7. ASUS U52F-BBG6 Wi-Fi Chip Replacement, Keyboard: step 7, image 1 of 2 ASUS U52F-BBG6 Wi-Fi Chip Replacement, Keyboard: step 7, image 2 of 2
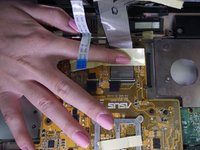
    • Unlatch the clip attaching the white flattened flexible cord with a blue tip to the circuit board with your thumb.

    • Pull out the white flattened cord.

    Ask FixBot

    Add Comment

  8. ASUS U52F-BBG6 Wi-Fi Chip Replacement: step 8, image 1 of 1
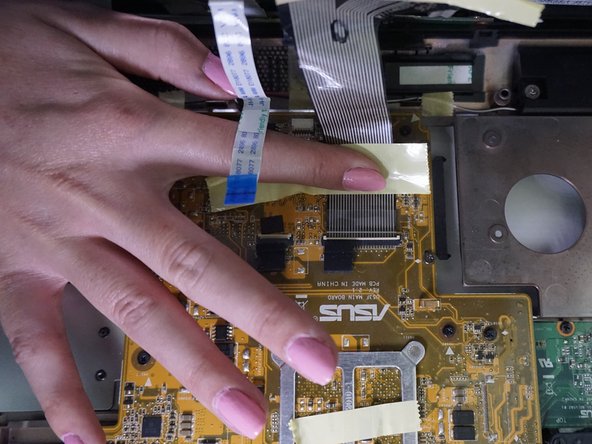
    • Pull back yellow tape attaching the metal colored flexible flattened cord to the circuit board.

    • Lift up the latch at the end of the cord.

    • Pull out the cord to release the keyboard.

    Ask FixBot

    Add Comment

  9. ASUS U52F-BBG6 Wi-Fi Chip Replacement, Wi-fi Chip: step 9, image 1 of 1
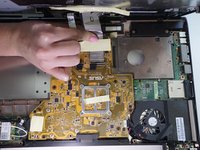
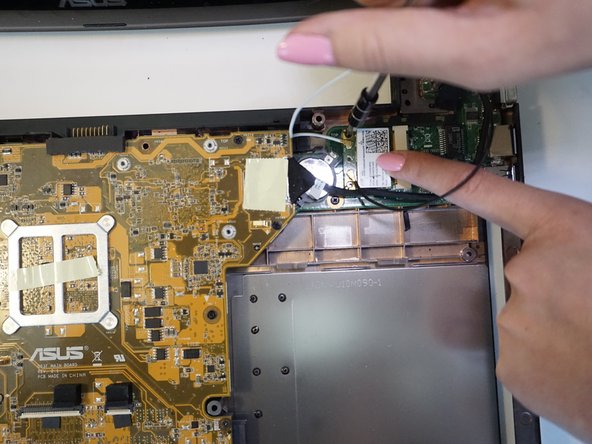
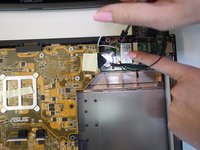
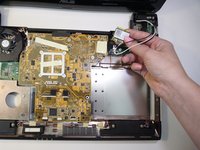
    • Find the Wi-Fi chip circuit board, which has a white sticker on it and is connected to a black and white wire.

    Ask FixBot

    Add Comment

  10. ASUS U52F-BBG6 Wi-Fi Chip Replacement: step 10, image 1 of 2 ASUS U52F-BBG6 Wi-Fi Chip Replacement: step 10, image 2 of 2
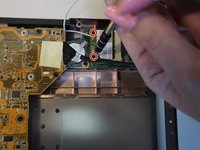
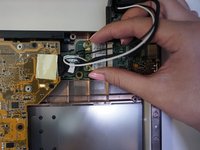
    • Unscrew the two 3mm Phillips screws using a J1 screwdriver to release the Wi-Fi chip.

    Ask FixBot

    Add Comment

  11. ASUS U52F-BBG6 Wi-Fi Chip Replacement: step 11, image 1 of 2 ASUS U52F-BBG6 Wi-Fi Chip Replacement: step 11, image 2 of 2
    • Pull out the Wi-Fi chip

    Ask FixBot

    Add Comment

  12. ASUS U52F-BBG6 Wi-Fi Chip Replacement: step 12, image 1 of 1
    • Pull off both wires from the chip.

    • It's advised to label the wires to remember where each colored wire connects to on the circuit board.

    Ask FixBot

    Add Comment

Conclusion

To reassemble your device, follow these instructions in reverse order.

Cancel: I did not complete this guide.

One other person completed this guide.

Ashley DeHuff

Member since: 09/15/16

852 Reputation

8 Guides authored

Team

CSU Fullerton, Team 1-3, Bruce Fall 2016 Member of CSU Fullerton, Team 1-3, Bruce Fall 2016

CSUF-BRUCE-F16S1G3

4 Members

9 Guides authored

0 Guide Comments

Add Comment

View Statistics:

Past 24 Hours: 1

Past 7 Days: 7

Past 30 Days: 25

All Time: 748