Free Shipping on Domestic Orders $75+

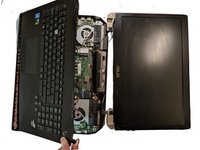
ASUS ROG G750JW-RS72-CB Display Assembly Replacement

What you need

    1. ASUS ROG G750JW-RS72-CB Display Assembly Replacement, Battery: step 1, image 1 of 1
      • Make sure you completely power down the computer before beginning this process.

      • With your finger, push this slide to the right. The battery should pop out of place.

      Ask FixBot

      Add Comment

    2. ASUS ROG G750JW-RS72-CB Display Assembly Replacement: step 2, image 1 of 1
      • Pull the battery out of its place gently.

      Ask FixBot

      Add Comment

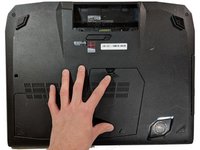
    1. ASUS ROG G750JW-RS72-CB Display Assembly Replacement, Hard Drive: step 3, image 1 of 1
      • Lift up the flap using a plastic opening tool.

      • Hold the flap back with your finger.

      Ask FixBot

      Add Comment

    2. ASUS ROG G750JW-RS72-CB Display Assembly Replacement: step 4, image 1 of 1
      • Unscrew the 5.2mm screw underneath the flap.

      Ask FixBot

      Add Comment

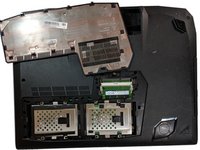
    3. ASUS ROG G750JW-RS72-CB Display Assembly Replacement: step 5, image 1 of 2 ASUS ROG G750JW-RS72-CB Display Assembly Replacement: step 5, image 2 of 2
      • Once the screw is out, pull on the plastic tab to pull off the plastic cover.

      Ask FixBot

      Add Comment

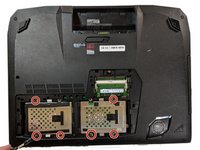
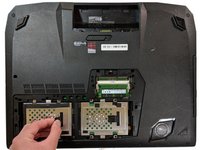
    4. ASUS ROG G750JW-RS72-CB Display Assembly Replacement: step 6, image 1 of 3 ASUS ROG G750JW-RS72-CB Display Assembly Replacement: step 6, image 2 of 3 ASUS ROG G750JW-RS72-CB Display Assembly Replacement: step 6, image 3 of 3
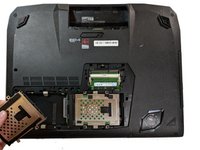
      • Unscrew the 5.2mm screws holding the hard drive in place.

      • Gently pull the rubber hard drive mount to the side.

      • Pull the drive out.

      Ask FixBot

      Add Comment

    1. ASUS ROG G750JW-RS72-CB Display Assembly Replacement, Display Assembly: step 7, image 1 of 1
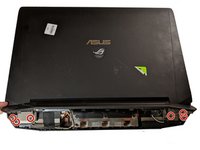
      • Remove the 8.5mm screws holding the bottom half of the laptop together.

      Ask FixBot

      Add Comment

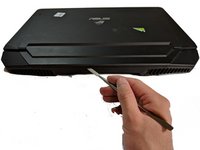
    2. ASUS ROG G750JW-RS72-CB Display Assembly Replacement: step 8, image 1 of 2 ASUS ROG G750JW-RS72-CB Display Assembly Replacement: step 8, image 2 of 2
      • Take a metal separater and gently pry open the back end of the laptop halves.

      Ask FixBot

      Add Comment

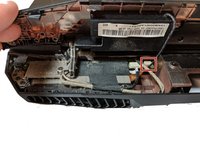
    3. ASUS ROG G750JW-RS72-CB Display Assembly Replacement: step 9, image 1 of 2 ASUS ROG G750JW-RS72-CB Display Assembly Replacement: step 9, image 2 of 2
      • Remove the connector connecting the screen and the motherboard

      Ask FixBot

      Add Comment

    4. ASUS ROG G750JW-RS72-CB Display Assembly Replacement: step 10, image 1 of 2 ASUS ROG G750JW-RS72-CB Display Assembly Replacement: step 10, image 2 of 2
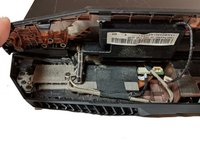
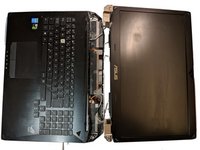
      • Unscrew the 6.8mm screws holding the hinges of the screen to the bottom half of the computer.

      • Detach the screen from the hinges of the laptop.

      • Be careful not to damage the connecting wires when detaching the screen.

      Ask FixBot

      Add Comment

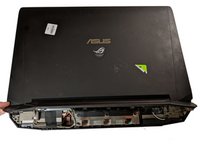
    5. ASUS ROG G750JW-RS72-CB Display Assembly Replacement: step 11, image 1 of 2 ASUS ROG G750JW-RS72-CB Display Assembly Replacement: step 11, image 2 of 2
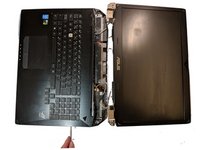
      • Use a metal separator to carefully separate the bottom half of the laptop.

      Ask FixBot

      Add Comment

    6. ASUS ROG G750JW-RS72-CB Display Assembly Replacement: step 12, image 1 of 1
      • Gently unplug the cables connecting the screen to the motherboard.

      • The display assembly can now be freely separated.

      Ask FixBot

      Add Comment

Conclusion

To reassemble your device, follow these instructions in reverse order.

Cancel: I did not complete this guide.

5 other people completed this guide.

Sully Chen

Member since: 01/22/18

525 Reputation

2 Guides authored

Team

Cal Poly, Team S11-G5, Banghart Winter 2018 Member of Cal Poly, Team S11-G5, Banghart Winter 2018

CPSU-BANGHART-W18S11G5

4 Members

60 Guides authored

1 Guide Comment

Super helpful.

Upon re-pasting GPU I noticed that not only GPU chip was covered in thermal paste surrounding chips were literately covered with thermal paste to is that normal?

Timepusher - Reply Share

Add Comment

View Statistics:

Past 24 Hours: 1

Past 7 Days: 14

Past 30 Days: 76

All Time: 2,411