
ASUS N550JK-DS71T Laptop Back Case Replacement

Steven Hahn and 3 other contributors
Last updated on Jun 25, 2018
Views: 2.5K
View statistics:
- Past 24 Hours:
- 3
- Past 7 Days:
- 17
- Past 30 Days:
- 87
- All Time:
- 2,475
Comments: 0
No one has left comments on this guide. Will you be first?
Go to guide commentsCompleted: 5 6
5 people have marked this guide "completed." Will you be next?
6 people have marked this guide "completed." Including you — great job!
Favorites: 0 1
No one has favorited (and subscribed to) this guide. Will you be the first?
1 person has favorited (and subscribed to) this guide — and that's you!
Introduction
Go to step 1 ↓This guide will detail how to remove and replace the back case of the device. This will give you access to the inner parts of the laptop.
What you need
Tools
-
Spudger4.9


-
-
-
Turn the laptop off and unplug all cables.
-
Flip over so the bottom is facing you.
-
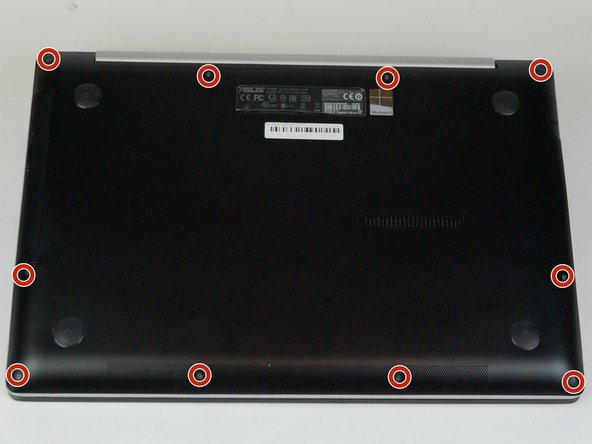
Remove the ten 3mm Torx T5 screws from the bottom cover.
 Ask FixBot
-
-
-
Use a spudger to wedge between the laptop and bottom cover—lift upwards to pry open.
-
Run the spudger along the perimeter of the bottom cover to remove.
-
-
-


To reassemble your device, follow these instructions in reverse order.
Cancel: I did not complete this guide.
5 other people completed this guide.

Team

USF Tampa, Team S5-G1, Passmore Spring 2018 Member of USF Tampa, Team S5-G1, Passmore Spring 2018
USFT-PASSMORE-S18S5G1
4 Members
72 Guides authored
