Free Shipping on Domestic Orders $75+

ASUS Chromebook CX1400CN Touchpad Replacement

What you need

    1. ASUS Chromebook CX1400CN Touchpad Replacement, Battery: step 1, image 1 of 3 ASUS Chromebook CX1400CN Touchpad Replacement, Battery: step 1, image 2 of 3 ASUS Chromebook CX1400CN Touchpad Replacement, Battery: step 1, image 3 of 3
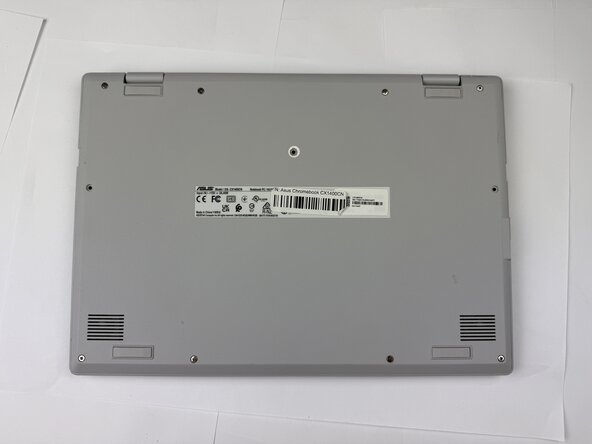
      • Flip the Chromebook over so the bottom is facing up.

      • Remove eleven 5mm screws on the back of the Chromebook using a Phillips #1 screwdriver.

      Ask FixBot

      Add Comment

    2. ASUS Chromebook CX1400CN Touchpad Replacement: step 2, image 1 of 3 ASUS Chromebook CX1400CN Touchpad Replacement: step 2, image 2 of 3 ASUS Chromebook CX1400CN Touchpad Replacement: step 2, image 3 of 3
      • Using a spudger, find a point of leverage under the plastic to pry from.

      • Pry the bottom of the plastic case from the frame.

      • Lift the cover off.

      Ask FixBot

      Add Comment

    3. ASUS Chromebook CX1400CN Touchpad Replacement: step 3, image 1 of 3 ASUS Chromebook CX1400CN Touchpad Replacement: step 3, image 2 of 3 ASUS Chromebook CX1400CN Touchpad Replacement: step 3, image 3 of 3
      • Be careful when removing the connections as to not break them.

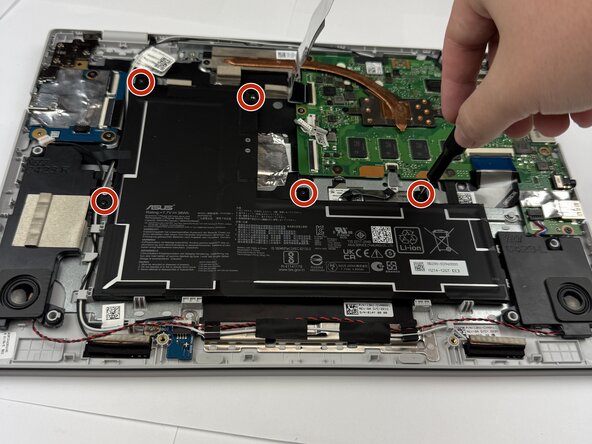
      • Detach the connectors that are in the way of lifting the battery out.

      • Remove the power delivery-to-motherboard connection.

      • Remove the battery-to-motherboard connection.

      • Remove the five 3mm screws securing the battery using a Phillips #1 screwdriver.

      Ask FixBot

      Add Comment

    4. ASUS Chromebook CX1400CN Touchpad Replacement: step 4, image 1 of 2 ASUS Chromebook CX1400CN Touchpad Replacement: step 4, image 2 of 2
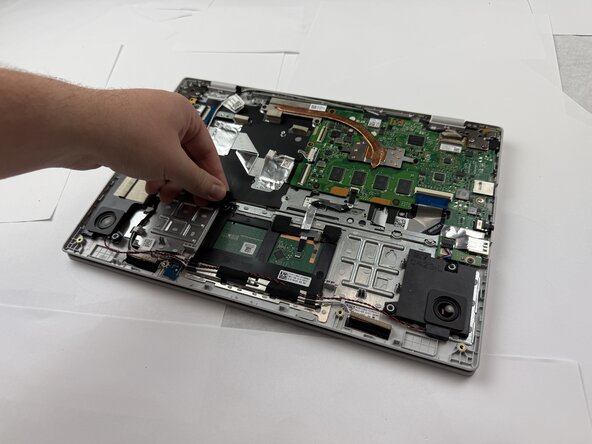
      • Remove the battery from the laptop.

      Ask FixBot

      Add Comment

    1. ASUS Chromebook CX1400CN Touchpad Replacement, Touchpad: step 5, image 1 of 2 ASUS Chromebook CX1400CN Touchpad Replacement, Touchpad: step 5, image 2 of 2
      • At the back of the touchpad, remove the stickers covering the screws.

      • Secure the stickers in an area that they will not stick to.

      Ask FixBot

      Add Comment

    2. ASUS Chromebook CX1400CN Touchpad Replacement: step 6, image 1 of 2 ASUS Chromebook CX1400CN Touchpad Replacement: step 6, image 2 of 2
      • On the right side of the back of the touchpad, carefully detach the foil on the connector to disable its sensors.

      Ask FixBot

      Add Comment

    3. ASUS Chromebook CX1400CN Touchpad Replacement: step 7, image 1 of 3 ASUS Chromebook CX1400CN Touchpad Replacement: step 7, image 2 of 3 ASUS Chromebook CX1400CN Touchpad Replacement: step 7, image 3 of 3
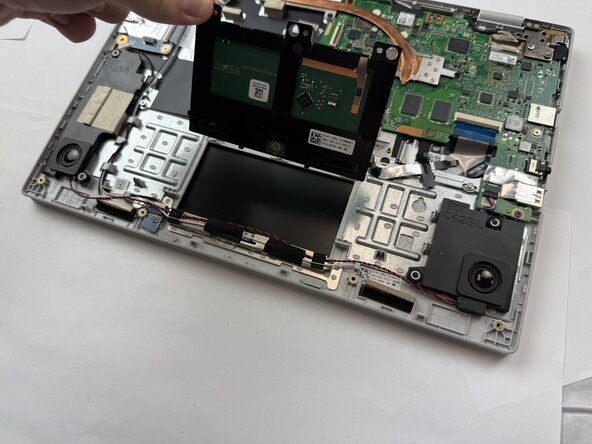
      • Remove the 3mm screws using a Phillips #1 screwdriver.

      • Remove the touchpad from the laptop.

      Ask FixBot

      Add Comment

Conclusion

To reassemble your device, follow these instructions in reverse order.

Cancel: I did not complete this guide.

One other person completed this guide.

Aric

Member since: 02/05/26

516 Reputation

4 Guides authored

Team

Texas Tech, Team 21-3, Samson Spring 2026 Member of Texas Tech, Team 21-3, Samson Spring 2026

TTU-SAMSON-S26S21G3

5 Members

48 Guides authored

0 Guide Comments

Add Comment

View Statistics:

Past 24 Hours: 0

Past 7 Days: 1

Past 30 Days: 22

All Time: 137