Introduction
If your speaker is malfunctioning or not reflecting the sound that is supposed to come from your laptop then you may have an underlying issues that stem from incorrect audio settings, outdated or corrupt drivers, software or hardware issues. Some fixes could be checking your volume and mute settings, running the Windows audio troubleshooter, updating or reinstalling drivers, and making sure all external devices are connected properly.
This guide however addresses the hardware issue of speakers not working and not the software issues I mentioned in the previous paragraph. It is very important to make sure that you identify whether or not your problem is an software or hardware issue.
In this replacement guide you will be replacing the two speakers located at the bottom corners of the base of the laptop. A few things to note before beginning the replacement. You will need three tools to complete the replacement: Phillips #00 Screwdriver, Angled Tweezers, and a Flat Blue Spudger.
What you need
-
-
-
Close the lid and set the laptop with down the bottom facing up.
-
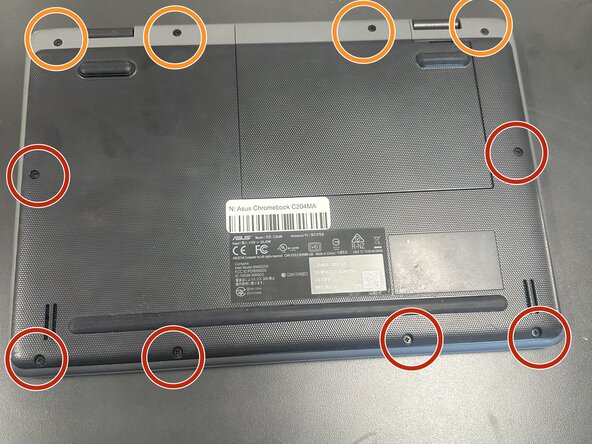
Use a Phillips #0 screwdriver to remove the following screws:
-
Six 6 mm-long
-
Four 8 mm-long
-
Lift and remove the panel.
 Ask FixBot
-
-
-
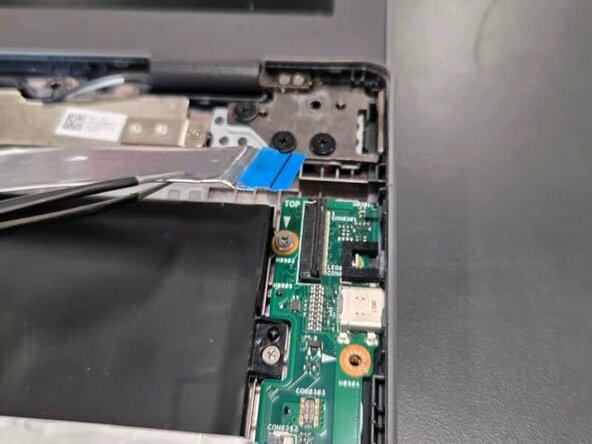
Lift the flap securing the keyboard ribbon cable and disconnect the ribbon cable.
-
-
-
Lift the locking flap securing the trackpad ribbon cable and disconnect the ribbon cable.
-
-
-
Lift up the silver hinge securing the battery connector and disconnect the battery connector.
-
-
-
Lift up the tape covering the display cable.
-
Lift the locking bar securing the display cable.
-
Disconnect the display cable.
-
-
-
Flip over the laptop and open the lid to a full 180 degrees.
-
Insert an opening pick into the seam between the palm rest assembly and chassis.
-
Slide the opening pick around the perimeter until the palm rest assembly fully releases.
-
Flip up the locking flap securing the touchpad ribbon cable.
-
Disconnect the ribbon cable.
-
Remove the palm rest assembly.
-
-
-
-
-
Close the lid and set the laptop with down the bottom facing up.
-
Use a Phillips #0 screwdriver to remove the following screws:
-
Six 6 mm-long
-
Four 8 mm-long
-
Lift and remove the panel.
-
-
-
-
Lift the flap securing the keyboard ribbon cable and disconnect the ribbon cable.
-
-
-
Lift the locking flap securing the trackpad ribbon cable and disconnect the ribbon cable.
-
-
-
Lift up the silver hinge securing the battery connector and disconnect the battery connector.
-
-
-
Lift up the tape covering the display cable.
-
Lift the locking bar securing the display cable.
-
Disconnect the display cable.
-
-
-
Flip over the laptop and open the lid to a full 180 degrees.
-
Insert an opening pick into the seam between the palm rest assembly and chassis.
-
Slide the opening pick around the perimeter until the palm rest assembly fully releases.
-
Remove the palm rest assembly.
-
-
-
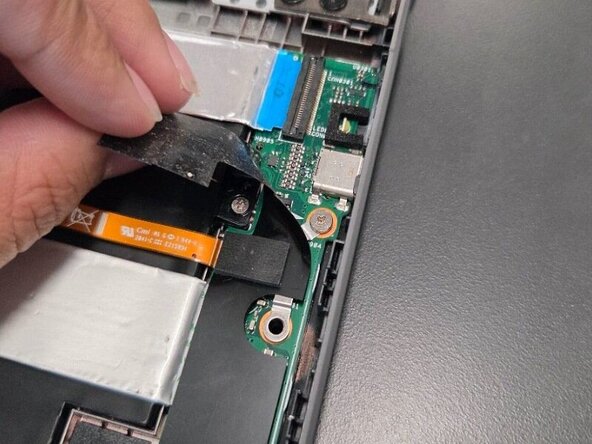
On the I/O board on the right half of the laptop, lift the black mylar film and unscrew the single 4 mm-long Phillips #0 screw.
-
Lift off the orange cable and black mylar film and set aside.
-
-
-
Lift up the locking flap securing the I/O board ribbon cable and disconnect the cable.
-
-
-
Lift up the locking flap securing the second I/O board ribbon cable and disconnect the ribbon cable.
-
-
-
In order to remove the motherboard to reach closer towards the battery, these are the steps required.
-
Remove the following screws with a Phillips screwdriver: two 5 mm-long black screws by the upper left of motherboard; one 4 mm-long sliver screw upper middle of the motherboard and one 4 mm-long sliver screw by the bottom left corner of motherboard.
-
-
-
Unscrew two 4 mm-long sliver screws at the sliver thermal support bracket, located at the bottom left and middle right.
-
-
-
Using your hands lift mother board slightly up and pull to the right slowly until motherboard is free.
-
-
-
Upon removal of motherboard, move motherboard and left side speaker out of the way.
-
Remove the three 4 mm-long sliver screws located on the right side of upper right portion of battery, bottom right portion of battery and far bottom left of battery (located next to speaker)
-
-
-
Lift black tape on the bottom right side of the battery.
-
Unravel black speaker cord across battery with tweezers.
-
-
-
-
-
-
Lift and remove the black tape located to the bottom left of the speaker.
-
Remove the black speaker cord by unravelling it against the bottom of the battery using the angled tweezers.
-
Then lift up the black tape on the right side and remove the right bottom speaker.
-
Remove the speakers.
-
-
-
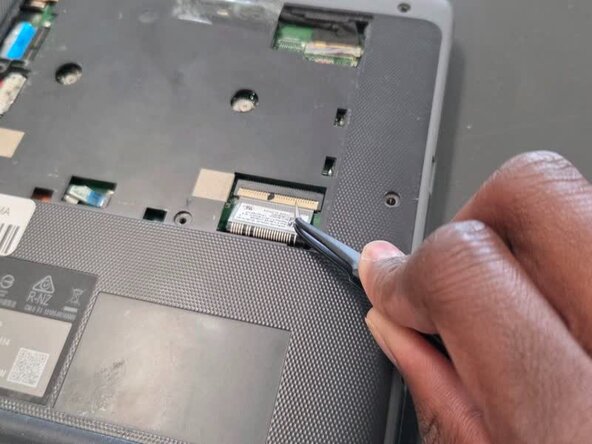
Flip over mother board and locate the speaker connector on the left speaker, highlighted in red.
-
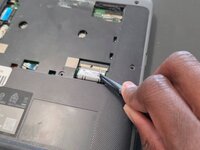
Remove plug by using the angled tweezers and pulling horizontally.
-
-












To reassemble your device, follow the above steps in reverse order.
Take your e-waste to an R2 or e-Stewards certified recycler.
Repair didn’t go as planned? Try some basic troubleshooting or ask our Answers community for help.

Team

Texas Tech, Team 45-67, Weston Fall 2025 Member of Texas Tech, Team 45-67, Weston Fall 2025
TTU-WESTON-F25S45G67
4 Members
60 Guides authored
