
Free Shipping on Domestic Orders $75+

20V WORX Power Share GT 3.0 12" Trimmer Spool Replacement

What you need

  1. 20V WORX Power Share GT 3.0 12" Trimmer Spool Replacement, Trimmer String: step 1, image 1 of 2 20V WORX Power Share GT 3.0 12" Trimmer Spool Replacement, Trimmer String: step 1, image 2 of 2
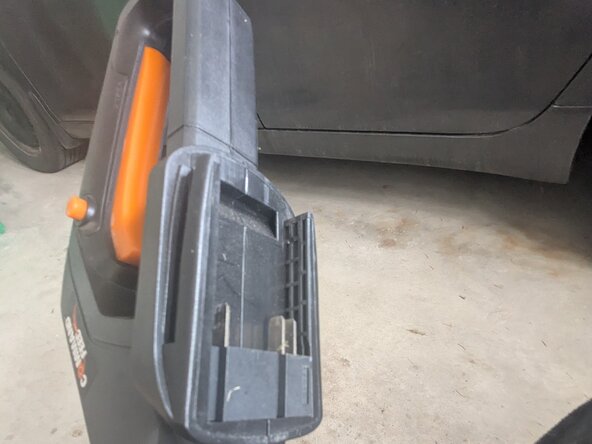
    • Press and hold down the large orange button on the top of the battery.

    • While holding the orange button, firmly slide the battery down the handguard of the trimmer to disconnect it.

    • Removing the battery ensures the device cannot unintentionally activate mid repair, skipping this step may result in serious injury.

  2. 20V WORX Power Share GT 3.0 12" Trimmer Spool Replacement: step 2, image 1 of 1
    • Flip the trimmer upside down so the bottom of the guard is facing upwards before starting to work on the trimmer.

    • If your trimmer is not lying flat, step down firmly on the top of the guard and firmly push the handle down until the handle lies parallel to ground.

  3. 20V WORX Power Share GT 3.0 12" Trimmer Spool Replacement: step 3, image 1 of 2 20V WORX Power Share GT 3.0 12" Trimmer Spool Replacement: step 3, image 2 of 2
    • Pinch and hold the orange tabs on the side of the spool cap.

    • While squeezing the spool cap, firmly lift the cap until it separates from the spool housing.

  4. 20V WORX Power Share GT 3.0 12" Trimmer Spool Replacement: step 4, image 1 of 2 20V WORX Power Share GT 3.0 12" Trimmer Spool Replacement: step 4, image 2 of 2
    • Lift the empty trimmer spool out of the spool housing.

  5. 20V WORX Power Share GT 3.0 12" Trimmer Spool Replacement: step 5, image 1 of 2 20V WORX Power Share GT 3.0 12" Trimmer Spool Replacement: step 5, image 2 of 2
    • Without unraveling the entire spool, grab the loose trimmer line from your replacement trimmer spool.

    • Starting from the inside of the trimmer housing, thread about 2 inches of trimmer line through the hole on the side of the housing.

    • Continue to thread the line without unwinding it until you reach your trimmer spool.

    • Push the spool down into place once it reaches the spool housing.

  6. 20V WORX Power Share GT 3.0 12" Trimmer Spool Replacement: step 6, image 1 of 2 20V WORX Power Share GT 3.0 12" Trimmer Spool Replacement: step 6, image 2 of 2
    • Line up the sides of the spool cap with the grooves in the spool housing.

    • Push firmly until the cap is in place.

    • You should hear a click when the cap is properly secure.

  7. 20V WORX Power Share GT 3.0 12" Trimmer Spool Replacement: step 7, image 1 of 3 20V WORX Power Share GT 3.0 12" Trimmer Spool Replacement: step 7, image 2 of 3 20V WORX Power Share GT 3.0 12" Trimmer Spool Replacement: step 7, image 3 of 3
    • Press and hold the line feed button on the side of the spool housing.

    • While holding the line feed button, pull on the trimmer line until it extends just shy of the line cutter.

    • The line cutter may be sharp, do not touch the line cutter, you can safely check the length of the trimmer line by holding it a safe distance above the line cutter.

    • Don't worry if you pulled the trimmer line too far, the line cutter will automatically cut any stray line during regular use.

  8. 20V WORX Power Share GT 3.0 12" Trimmer Spool Replacement: step 8, image 1 of 2 20V WORX Power Share GT 3.0 12" Trimmer Spool Replacement: step 8, image 2 of 2
    • Line up the ridges on the tool with the grooves of the battery.

    • Pull the battery straight down until you hear it click into place.

Conclusion

Your trimmer should now function normally, easily cutting through grass and weeds until its time for the next spool replacement.

One other person completed this guide.

Arjun Saini

Member since: 01/09/26

178 Reputation

1 Guide authored

0 Guide Comments

Add Comment

View Statistics:

Past 24 Hours: 1

Past 7 Days: 13

Past 30 Days: 24

All Time: 88